- Lecia TL
- Leica CL
- Olympus EP-5
- Olympus pen-F
- Nikon Coolpix A
- Fuji XF10
- Lumix GX9
- Ricoh GR2 / GR3
- Fuji X-E2/2s/3
- Canon EOS M200 and EF-M 22mm f/2
- Lumix GX880
- Lumix GX80
Visiting the London Leica Store
 Exciting!
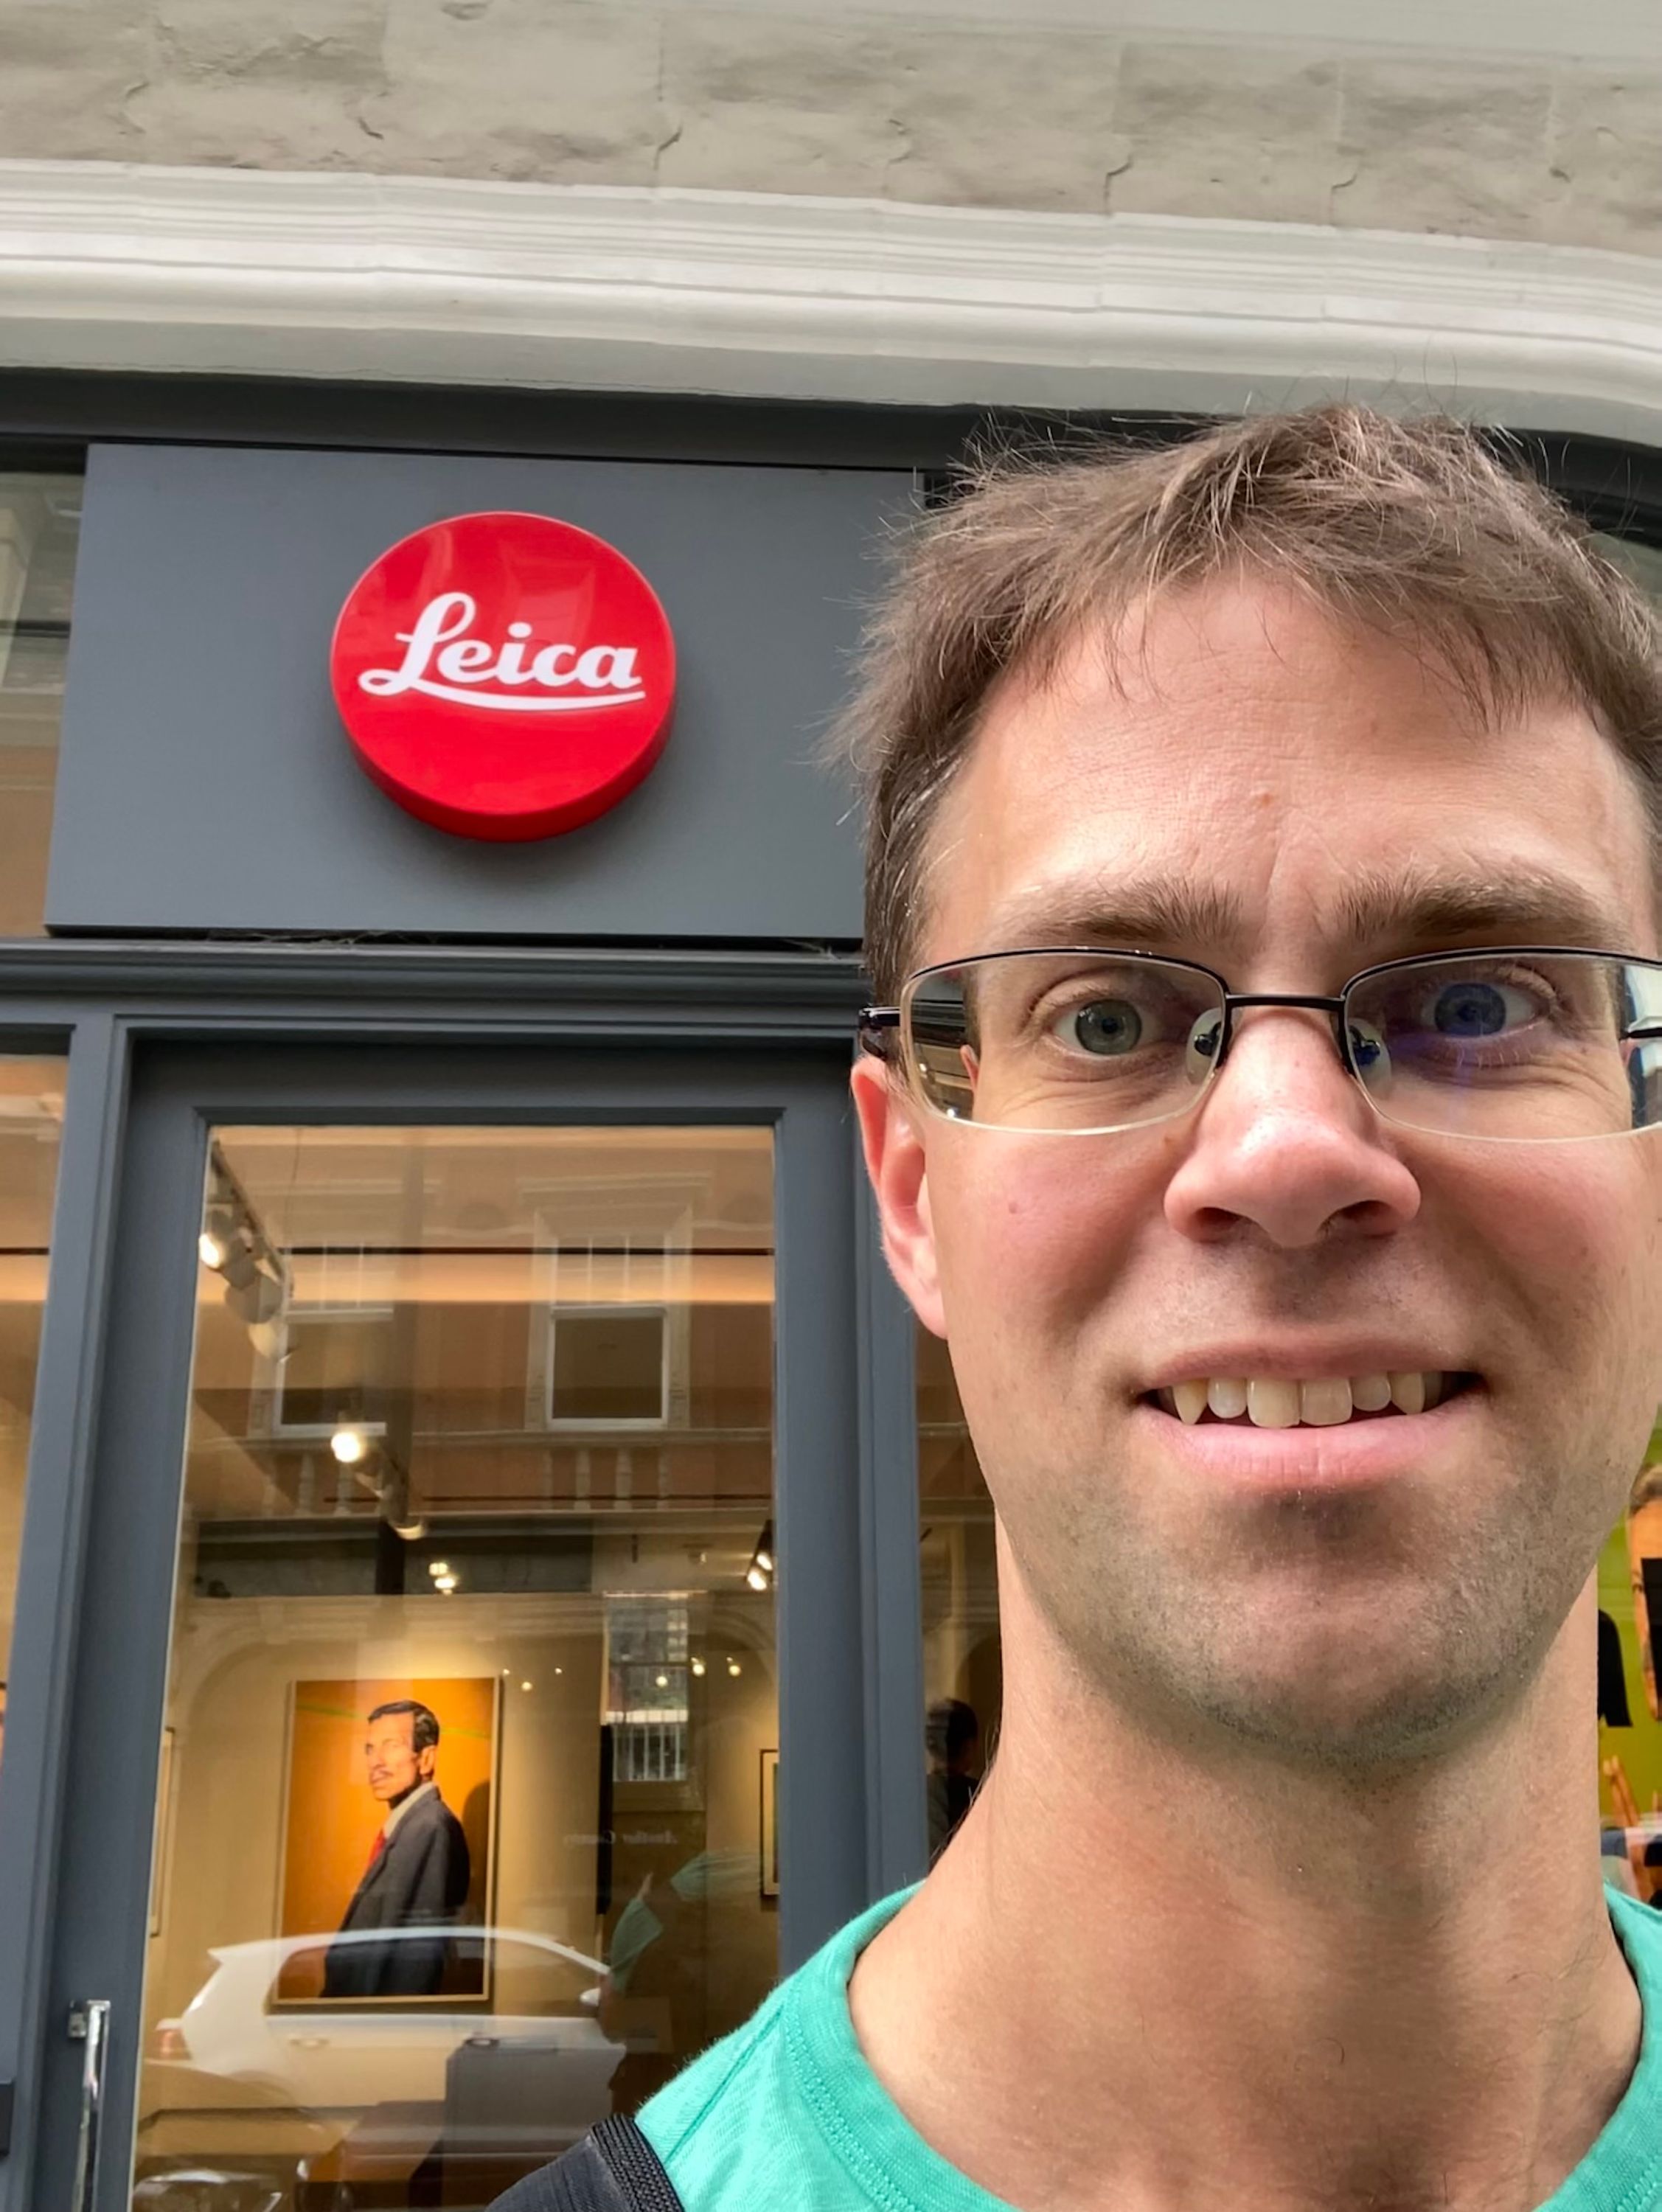
A few weeks ago I was passing through London and thought I’d take the opportunity to visit the flagship Leica store of the UK - London Mayfair. If you’ve played Monopoly, you’ll know this is the expensive part of town!
It was quite the store. Display cabinets with all the cameras and lenses - M, SL, Q. There was a gallery and various display cabinets. I could’ve spent hours there, but unfortunately I only had about 20 minutes between trains.
I wanted to try out the M10, and I asked the white T-shirt’d hipster looking attendant if they had any I could try out. They only had a display M10-R as supposedly everything else was back at Wetzlar being looked over. I tried it with the 35mm summilux that was attached to it when he brought it out and then with the 90mm tele-elmarit I had with me. It felt exactly like holding the M2, it was unreal. The viewfinder was so bright and clear. It was lovely, and at that moment I was convinced I needed to get one.
But when I got home, and looked at the prices, that certainty started to dissolve.
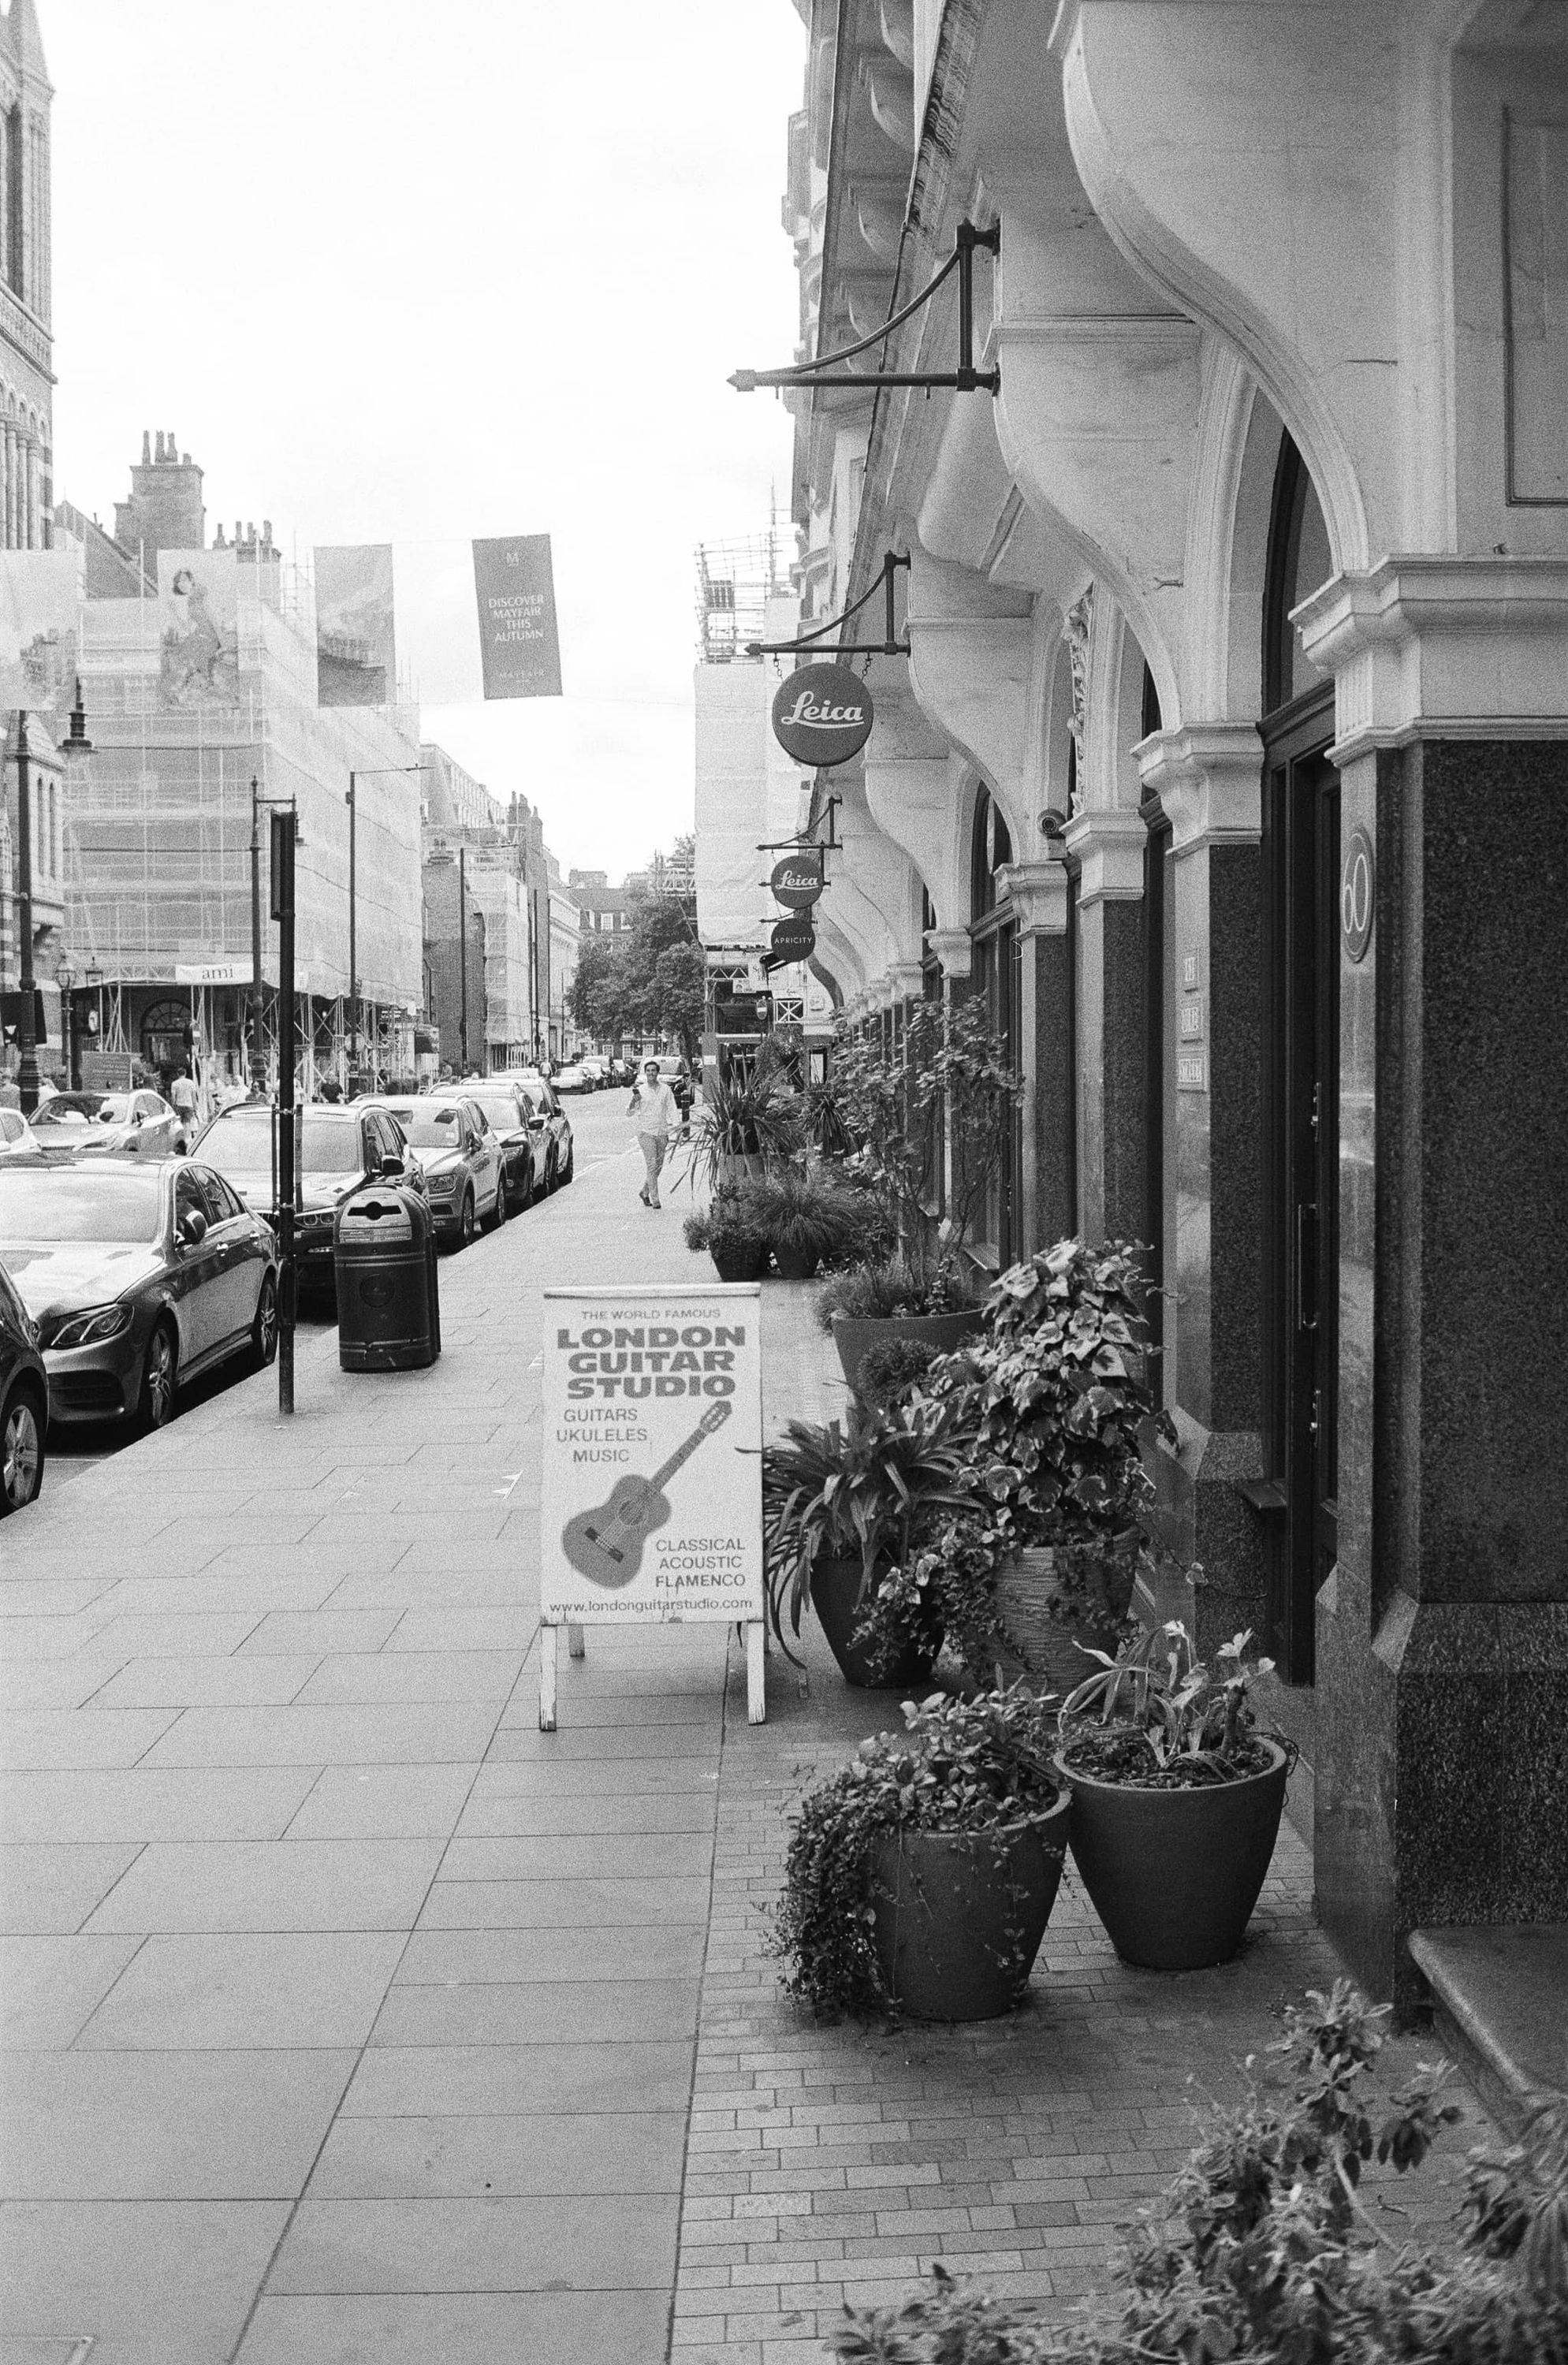 Duke Street, W1
Kosmos Foto Mono Film Stock thoughts
 Old school soviet box design
I was going to call this a review but it’s not that official. Kosmo Foto Mono is a 100-ISO panchromatic black-and-white film. I think I bought it as I liked the box design more than any meticulous research that I undertook. I think it’s made by Fomapan, but I think it’s quite different to the Fomapan line. They suggest you can pull it to 50 and push it to 400, which I think is unusal for a panchromatic film. I’ve not pushed it myself, and I shot it at the box 100 speed.
 The photo that attracts the most remarks
As I said, I bought it mostly on a whim, I think I was just picking a random selection of things to try out. It might’ve been on sale too. I took it with me in the M2 when we went out to Drum Castle - a historic family castle with woods and walled gardens to explore. Being ISO 100, it’s always a bit of a risk here in Scotland. A sunny day can quickly turn cloudy and then all of a sudden f/4 is starting to be a push, and then going into the woods means I’m down to f/1.4-2.8. However, I managed to get quite a few nice shots of the kids playing. I didn’t really study the photos too much, as I tend to get multiple films developed at once there’s more to look at.
What caused me to go back and really look at them was that numerous people commented on how much they liked the photo above. My wife had used it in our family calendar for this year and so when it came to that month, everyone commented on it.
 Woods + B&W is a favourite
It’s not a single thing that makes up a photo, but a combination of everything. I do think this particular B&W film stock looks good and compliments the scenes.
 Smile!
It’s a bit of a niche stock and probably not all that available but if you do come across a roll, I’d suggest giving it a try. I think if you can shoot it at ISO 50, the internet tells me your results will be even better! 🌞
 M6 prototype for Queen Elizabeth
Happy 60th Birthday!
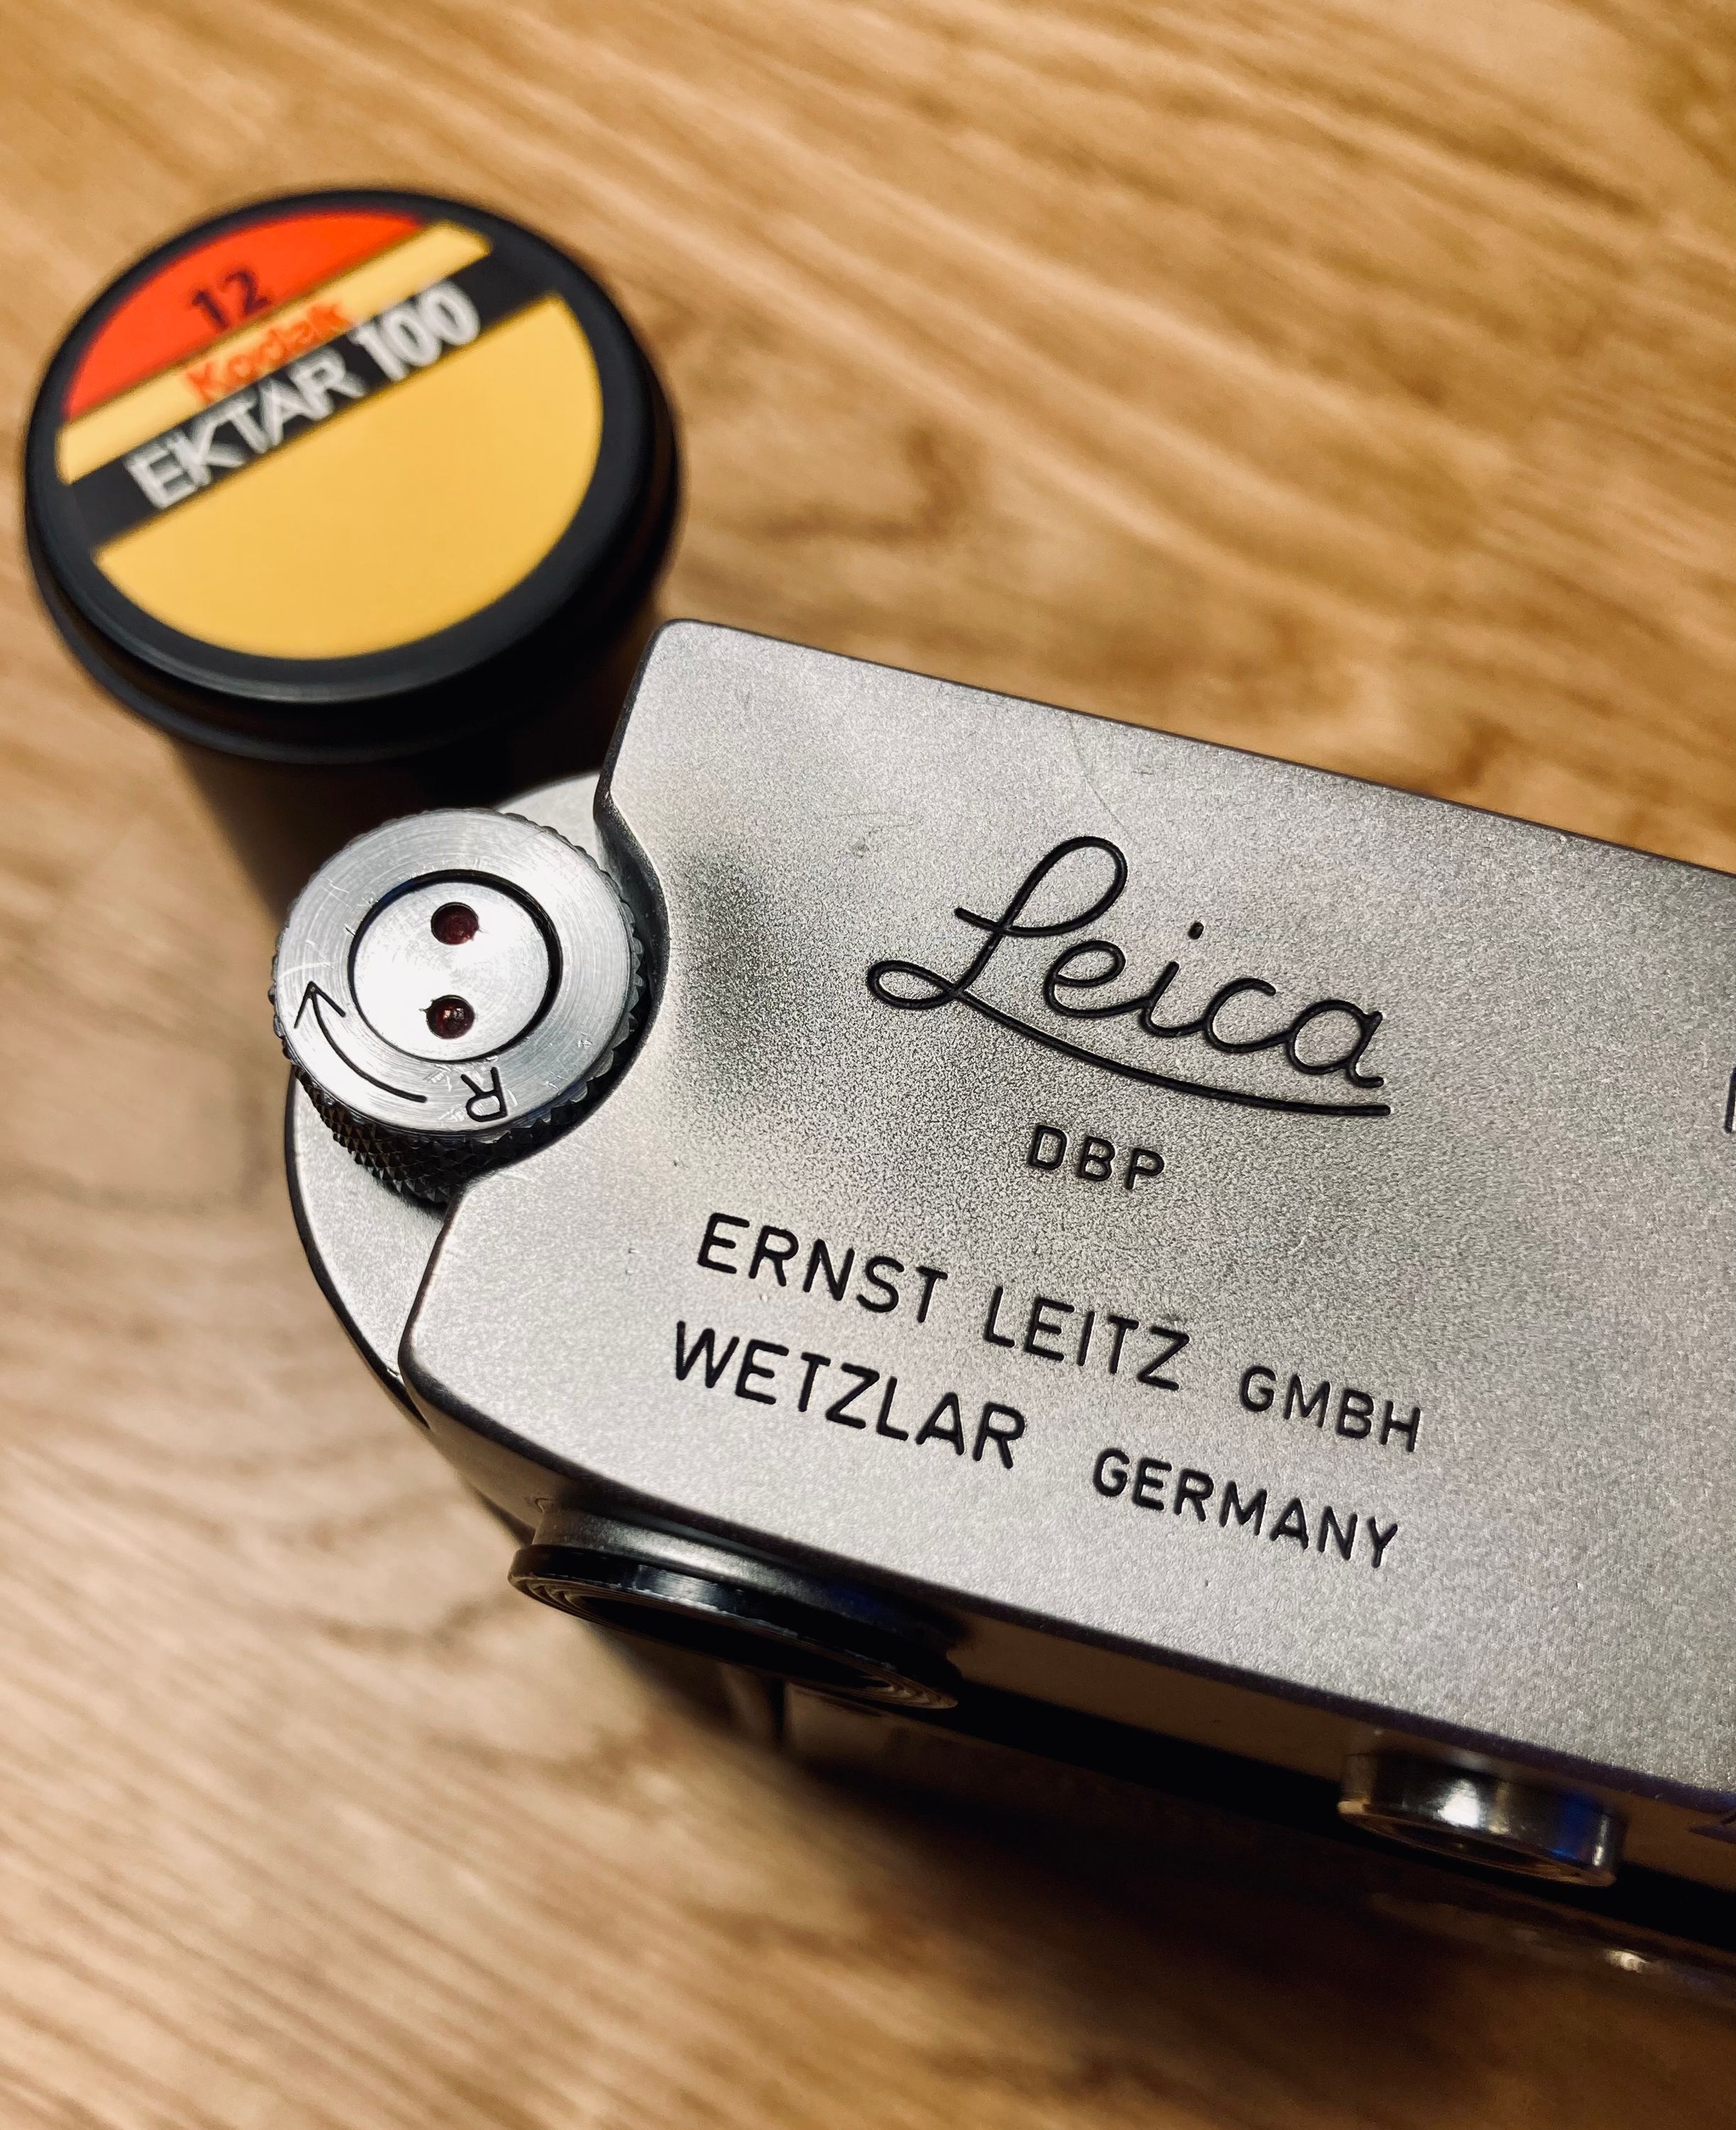 60 years of rewinding
My Leica M2 was made in 1962, according to the serial number, and it works just as well today as it did when it was first made.
It’s my most favourite camera. I love the rangefinder focusing, and the feel and quality of it are outstanding. With a little care and maintenance this camera will last me another 60 years and beyond. My grandfather was a keen photographer and took many photos in his life. Unfortunately not many survived, and certainly none of his cameras. I don’t know if he ever had a Leica, I suspect not, but if he did then this could’ve been his. Even though it has no sentimental value, being from 1962 is the era of the few slide photos I do have from my grandfather, so it reminds me of him that way.
It is just a box, and it’s the lenses and film emulsion that truly make the photos, but it’s a box that makes you want to keep coming back to take more. I just hope film doesn’t become such an expensive luxury that the camera gets used less and less.
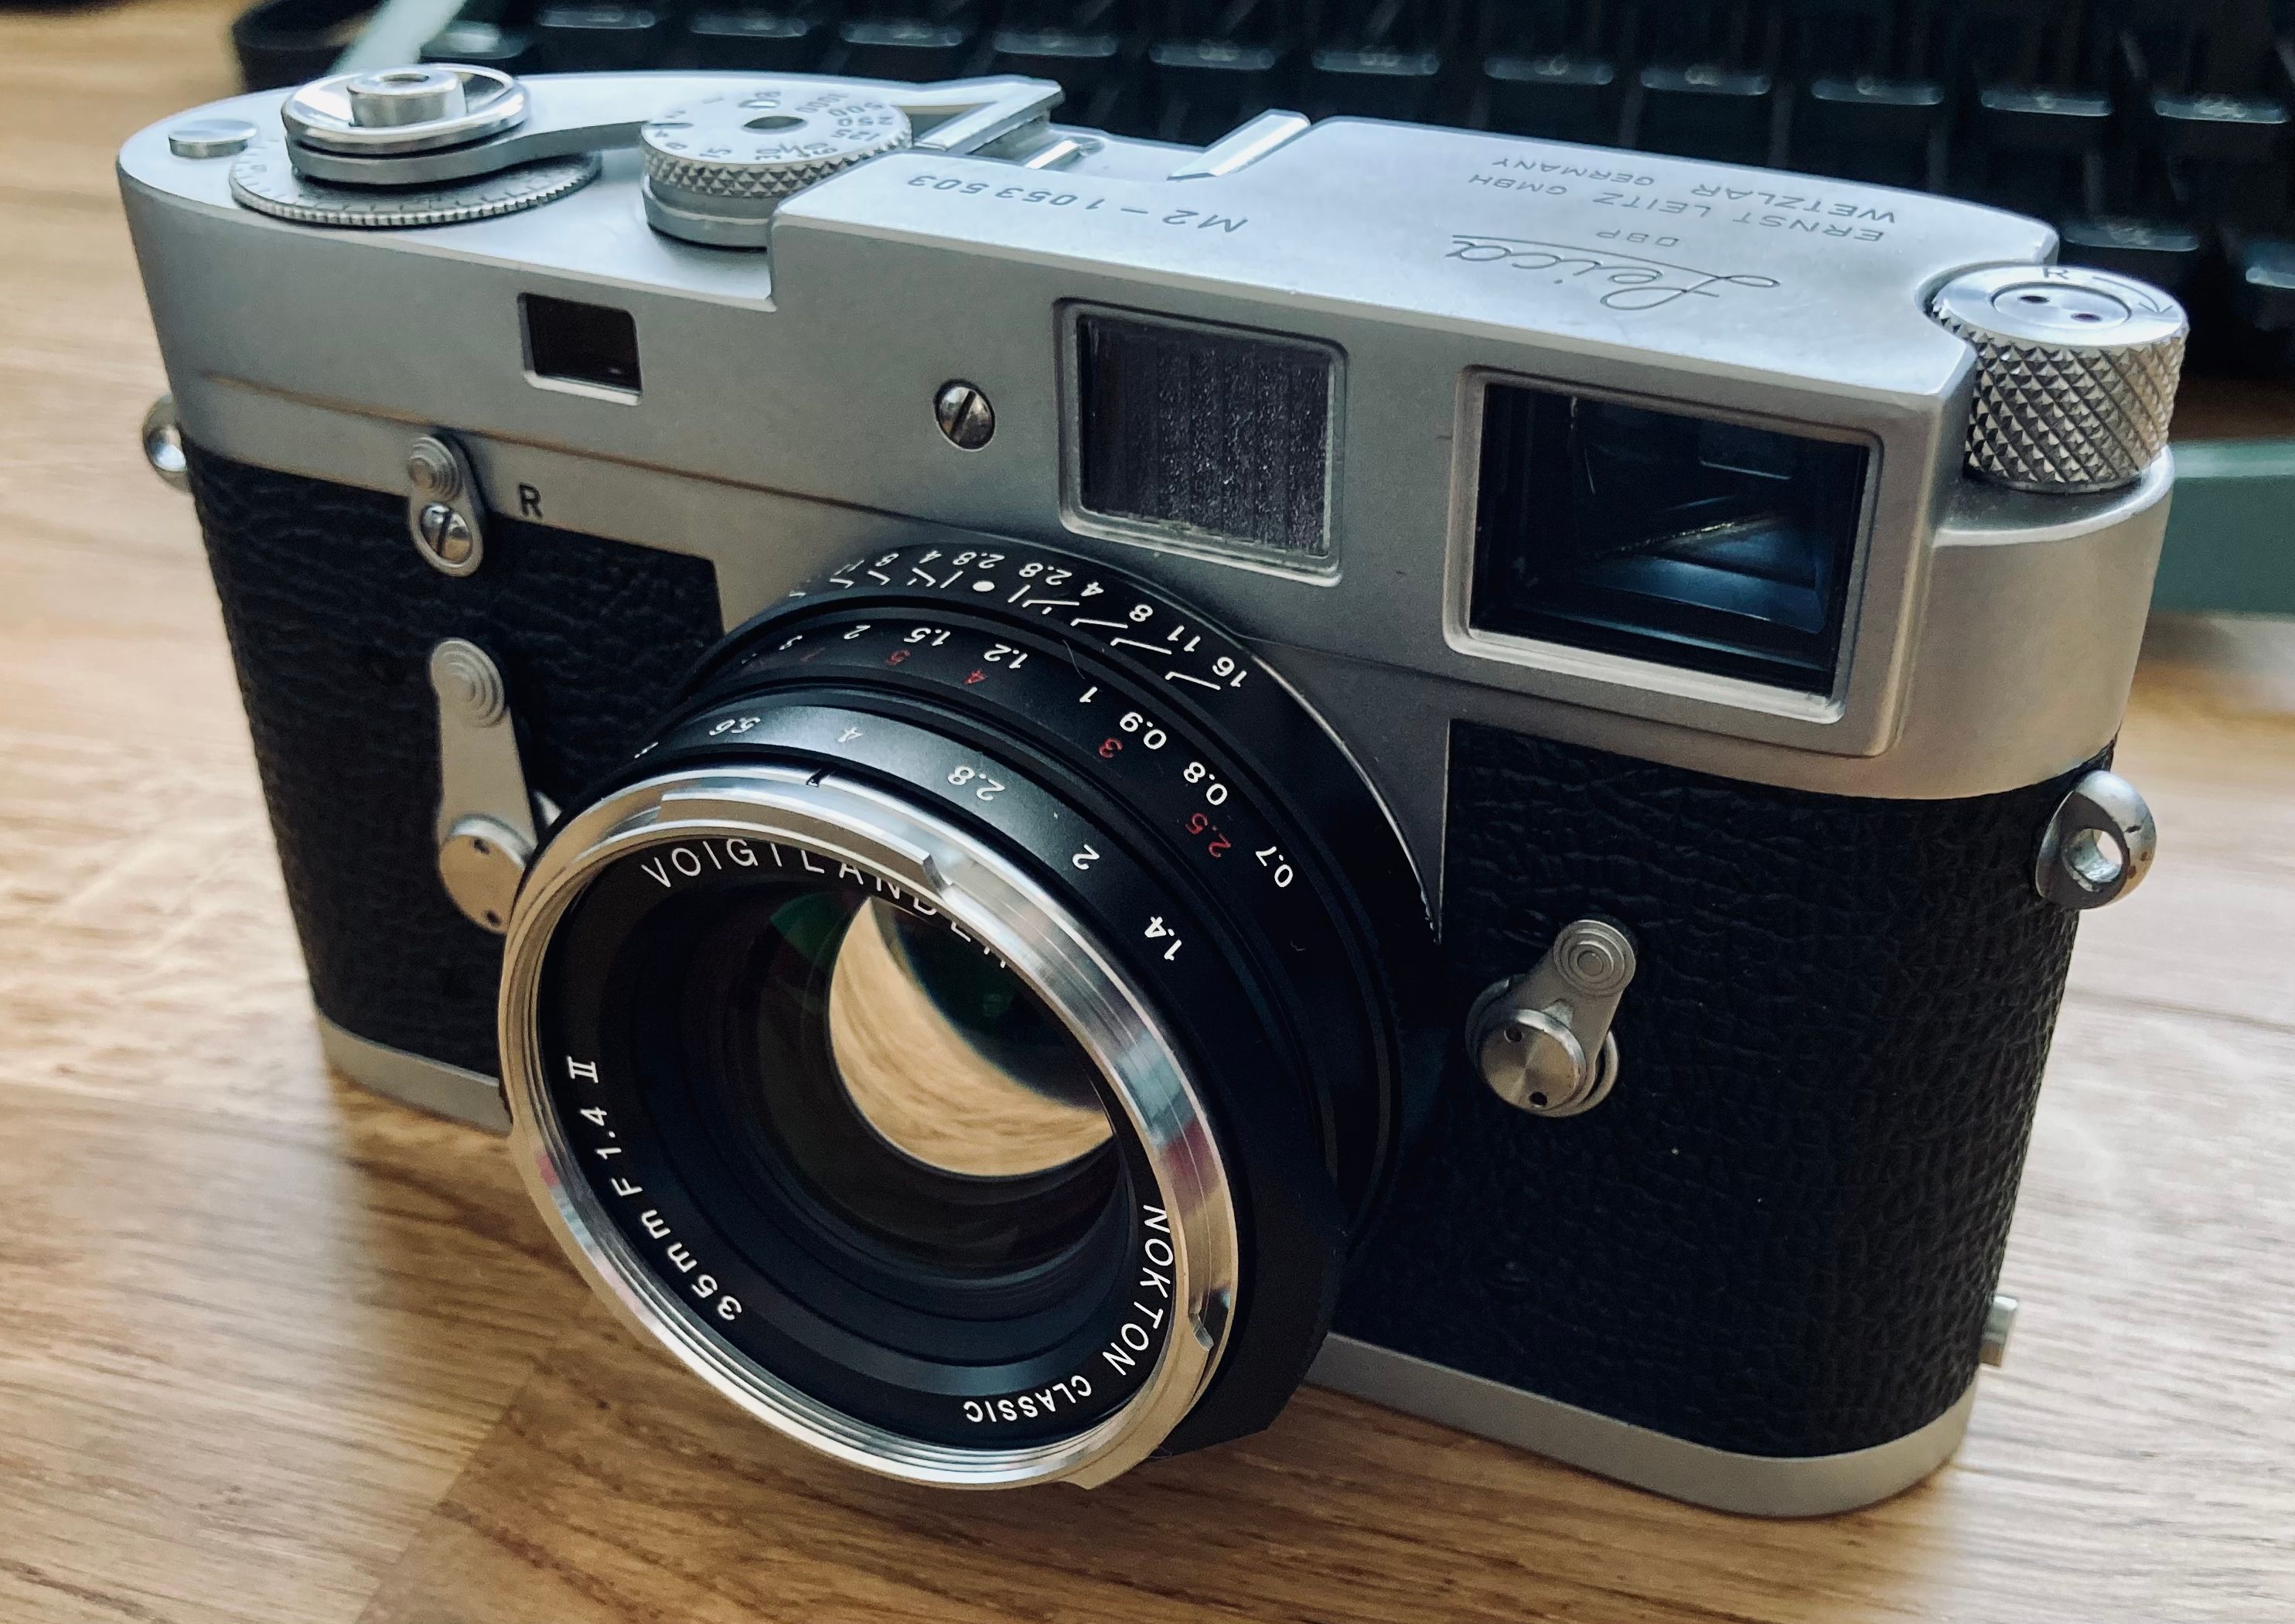 With Voigtlander Nokton
Big Orange
 The Subject
I like big oranges. Navel or winter or Jaffa or whatever they’re called at various points of the year. They’re always big. Bigger than clementines or satsumas (what is the difference?) or other citrus fruit of that colour but which are smaller. They’re satisfying to eat, they fill you up somewhat, generally juicy, and a good size. They can be a pudding or a snack and you’re not looking around for another or something else. An all round good fruit.
One thing that I’ve found over the years of eating big oranges in public, is that not many people like big oranges. I’m surprised by this, given all the reasons I’ve stated why big oranges are good. What’s also surprising, but equally surprisingly common, is that people will comment about how the orange looks nice but state that they’d never eat one. They stand there and watch me take it out my bag or pick it up from its resting place on my desk and begin the peeling process. Maybe they mutter it, maybe they say it clear as day, or maybe they just think it, but it’s always the same: “I’d never eat a big orange”.
Now is a good time to talk about the process of peeling a big orange. I think this is important as I think this is one of the main reasons why people don’t like eating big oranges. I could be wrong as I’ve never challenged people to why they’d never eat a big orange, out of respect of their life choices, but I reckon the peeling plus one other item is why.
The peeling process does depend on the type of orange. (I’m aware of Homer Simpson taking a marriage class, whilst Hans Moleman takes an orange eating class in a classic episode of The Simpson’s (S5E22 if you must know)).
 The Orange Eating Class
Anyway, if the skin is thick then it’s typically very easy to peel. A single peel is very achievable, even by the most novice of big orange eater. If the skin is thin then it can be slow going, especially if you get into the pick off tiny pieces mode. I recommend just skipping straight to the knife and cutting it into segments if you find yourself in this situation.
Start by rolling it around in your hands, then alternative squeezing it with your thumbs. You’re trying to “soften it up” I find it helps relax or even break the bond of the skin to the segments. However, you don’t want to squeeze it too much as you might burst the cell walls and end up in a messy situation. The next stage is the first pierce of the skin. I like to find a spot around the Tropic of Cancer - imagine the orange as the Earth with the top that connects to the tree as the North Pole. You pinch the skin together a little to try and raise it away from the flesh. Do this with your thumb and index finger, then pierce the skin with your thumb. You don’t need to have big or sharp nails to do this. You need a nail but mine are short and work just fine. Once you’re in, then it’s about trying to pull away the skin without it breaking too soon. You’re trying to peel off a reasonable sized piece first, so that you have a good perimeter of skin in which to attack next. I use my thumb under the skin to separate it and work more of it away from the flesh. Once I have a decent sized piece, maybe 2” / 5 cm diameter piece, then I head up to the North Pole to pull out the pith stalk that’s inside. It has quite a big of friction and if you try with a too small piece of skin first then you risk breaking the skin away from the top and having to tackle it again in a harder manner. Once this is done then it’s a case of going around the rest of the skin with your thumb underneath and prising away more until it’s all done. Depending on the type of orange the South Pole can be tricker and generally messier. This is where you might get a belly button looking part which has lots of tiny segments inside all linked together in middle segment of a cone shape. Depending on what’s there I often find that leaving the very southern tip still with skin on and then opening up the orange into two halves makes getting this part out much easier. It’ll generally come away in two pieces on each half. It’ll have some orange on it that you could eat. However, if this is your first time I’d suggest just composting that part with the skin and worry about it another day.
From there you can just peel off large chunks of white pith that you probably don’t want to eat and then peel each segment apart from the main group and enjoy. If the segments are torn or some came off with the skin then you just have to improvise and eat as it comes. This is a situation which I can very clearly see why some people would be put off. That brings us nicely to the second main reason why people don’t eat big oranges:
The Mess 😱
This is particularly important when you’re not at home in the comfort of your own kitchen or shower. This is where people at work look at you dumbfounded. The risk you’ve introduced into the workplace by bringing, peeling and then eating a big orange when you never quite know the outcome of the peeling is, in many people’s view, unacceptable. The only credible mitigation that they’d accept is not eating the orange in the first place. Elimination, as the highest tier of risk mitigation strategy, is all they’d consider. This is where I feel they’re missing out. With great risk, comes great reward. That is not to say that I’ll risk it all, but with proper procedures and a competent operator, anyone can enjoy the fruits of a big orange.
But I understand. You don’t want orange juice on your hands, or face, or trousers or clothes or wherever, it’s messy, sticky, and ruins your look. Again, follow the process and you can be safe. If you’re really worried, find a sink and peel and eat the orange over it. Probably you want to practice this at home as you might get even more comments than merely eating a big orange in the first place. You can then direct any stray juice into the sink and wash your hands afterwards.
So I hope you can join me in the pleasure of eating a big orange wherever you may please and stand out amongst your peers.
🧡🧡🧡
If I wanted to see a man eating an orange, I would’ve taken the orange-eating class!
Ground’s Keeper Willie 🍊
Hobonichi - for those that want to be told what to do
I’ve looked at them a few times over the years but never bought one. They are pretty expensive - I guess from import duties etc. from Japan - and, you know, it’s just a notebook. However, I saw that the 2H 2022 ones were up for pre-order at a local online store and so I went for it. Being half the year means that it was maybe half the price.

Look on reddit or forums or wherever and people rave about the quality and paper and how nice they feel. Again, something I didn’t really buy when reading about it online. However, I’m now in that camp of “ermahgard this is the nicest notebook I’ve ever had.”
The paper feels smooth and is remarkably well suited to just about any pen and ink type you have. Even the cover feels nice. A lot of people get covers and holders for their technos, which do offer benefits such as pen holders and extra pockets for cards or tickets etc., but the vanilla notebook seems durable enough to keep it bare.
It comes in A6, which I initially thought would be too small, but now I appreciate the small size, as it makes it easy to bring back and forth to work or anywhere else I want to take it.
The biggest difference to most other notebooks, even ones with fancy paper and covers, is the prescribed layout inside. There are a lot of sections inside it. It’s similar to a diary but there’s more than just days of the week. There’s a year index, a month calendar, the individual days, a timetable, a top 100 list, favourites list, contacts, and probably a few other things I’ve forgotten. The individual days have the date, the moon phase, time slots, a meal journal, and a todo list part. There’s just so much in it but it’s all very well organised and laid out.
Whilst there’s a general way to use each section, you do have the freedom to do what you want. I like using the yearly index for a habit tracker, and the top 100 list for a book tracker. I’ve only just got mine so I might change these or find other uses.


I could do all this with a blank notebook, and one at the fraction of the price. However, I quite like being told what to do. Like the defaults in software, good ones are well thought out and you’d be wise to at least try it that way.
My half year doesn’t start until 1st July, so I’m only partially using it right now. I’ll see how I get one once the month rolls around. I think it could be just what I’m looking for, or it could be that I’m romanticising a heap of paper.
Compact Cameras
 It’s so tiny!
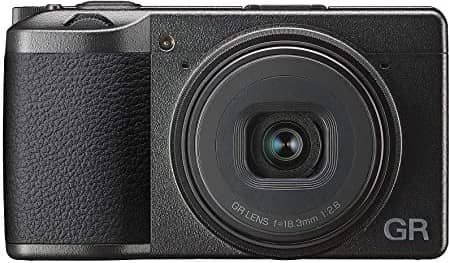
Whilst I’d love to get a Leica Q2 or even a GRIII, they’re quite expensive (quite being the understatement on the Q2). I’m interested in getting a compact camera to just take anywhere without it being a big deal. My Fuji isn’t huge but it’s not something that fits in the pocket or near enough. These last two statements don’t really support the Q2 whatsoever - it’s not that compact and given its price, it’ll always be a big deal - but I still want one.
This may be an excuse to buy more camera gear with the weak premise that it’s furfilling some other duty or need but I don’t care. Particularly as I’m trying to find something that is cheap - ideally <£100 but we’ll see.
Two/three that I first found which are quite interesting are the Olympus Pen E-PM2 (or maybe the 1 but that might be too old) and the Lumix LX100. These are both micro 4/3s sensors, so a compromise on sensor size but the benefit of being small. Whilst the sensor size is smaller than even APS-C, it’s still massively bigger than a phone.
The Olympus has an interchangable lens, and so you need to find a pancake lens to keep the size down. It’s nearly 10 years old but still has a respectable sensor. I’m worried I like it as it’s then another money pit for new lenses. I could be fun for small telephoto lenses but I also don’t need them. I’m also concerned that lens creep would result in ending up with a camera just as big as my X-T2.
The Lumix LX100 looks really like a Fuji, and the lens says Leica. So what’s not to like! It’ looks a bit old and, when turned on and the lens comes out, like quite big and unsubtle. However that’s not really that important. They also make a mark ii which has quite a few upgrades but also higher price. The zoom lens is a handy feature and I like how you can move between fixed focal lengths (e.g. 24, 28, 35 …) rather than just a continous zoom. It’s also quite good on video…not that I generally take much video.
However, once I started this search the flood gates opened and every new camera I’d investigate there’d be 100 comments with 100 new models that everyone recommended as being “much better”. Some of them that I noticed but still to look into are:
These are becoming way beyond my cheap criteria, and has just become a research distraction.
Then there is also getting a top end iPhone, because I’d always have it. Although it’s £1000 or whatever, and I don’t like taking pictures with a phone.
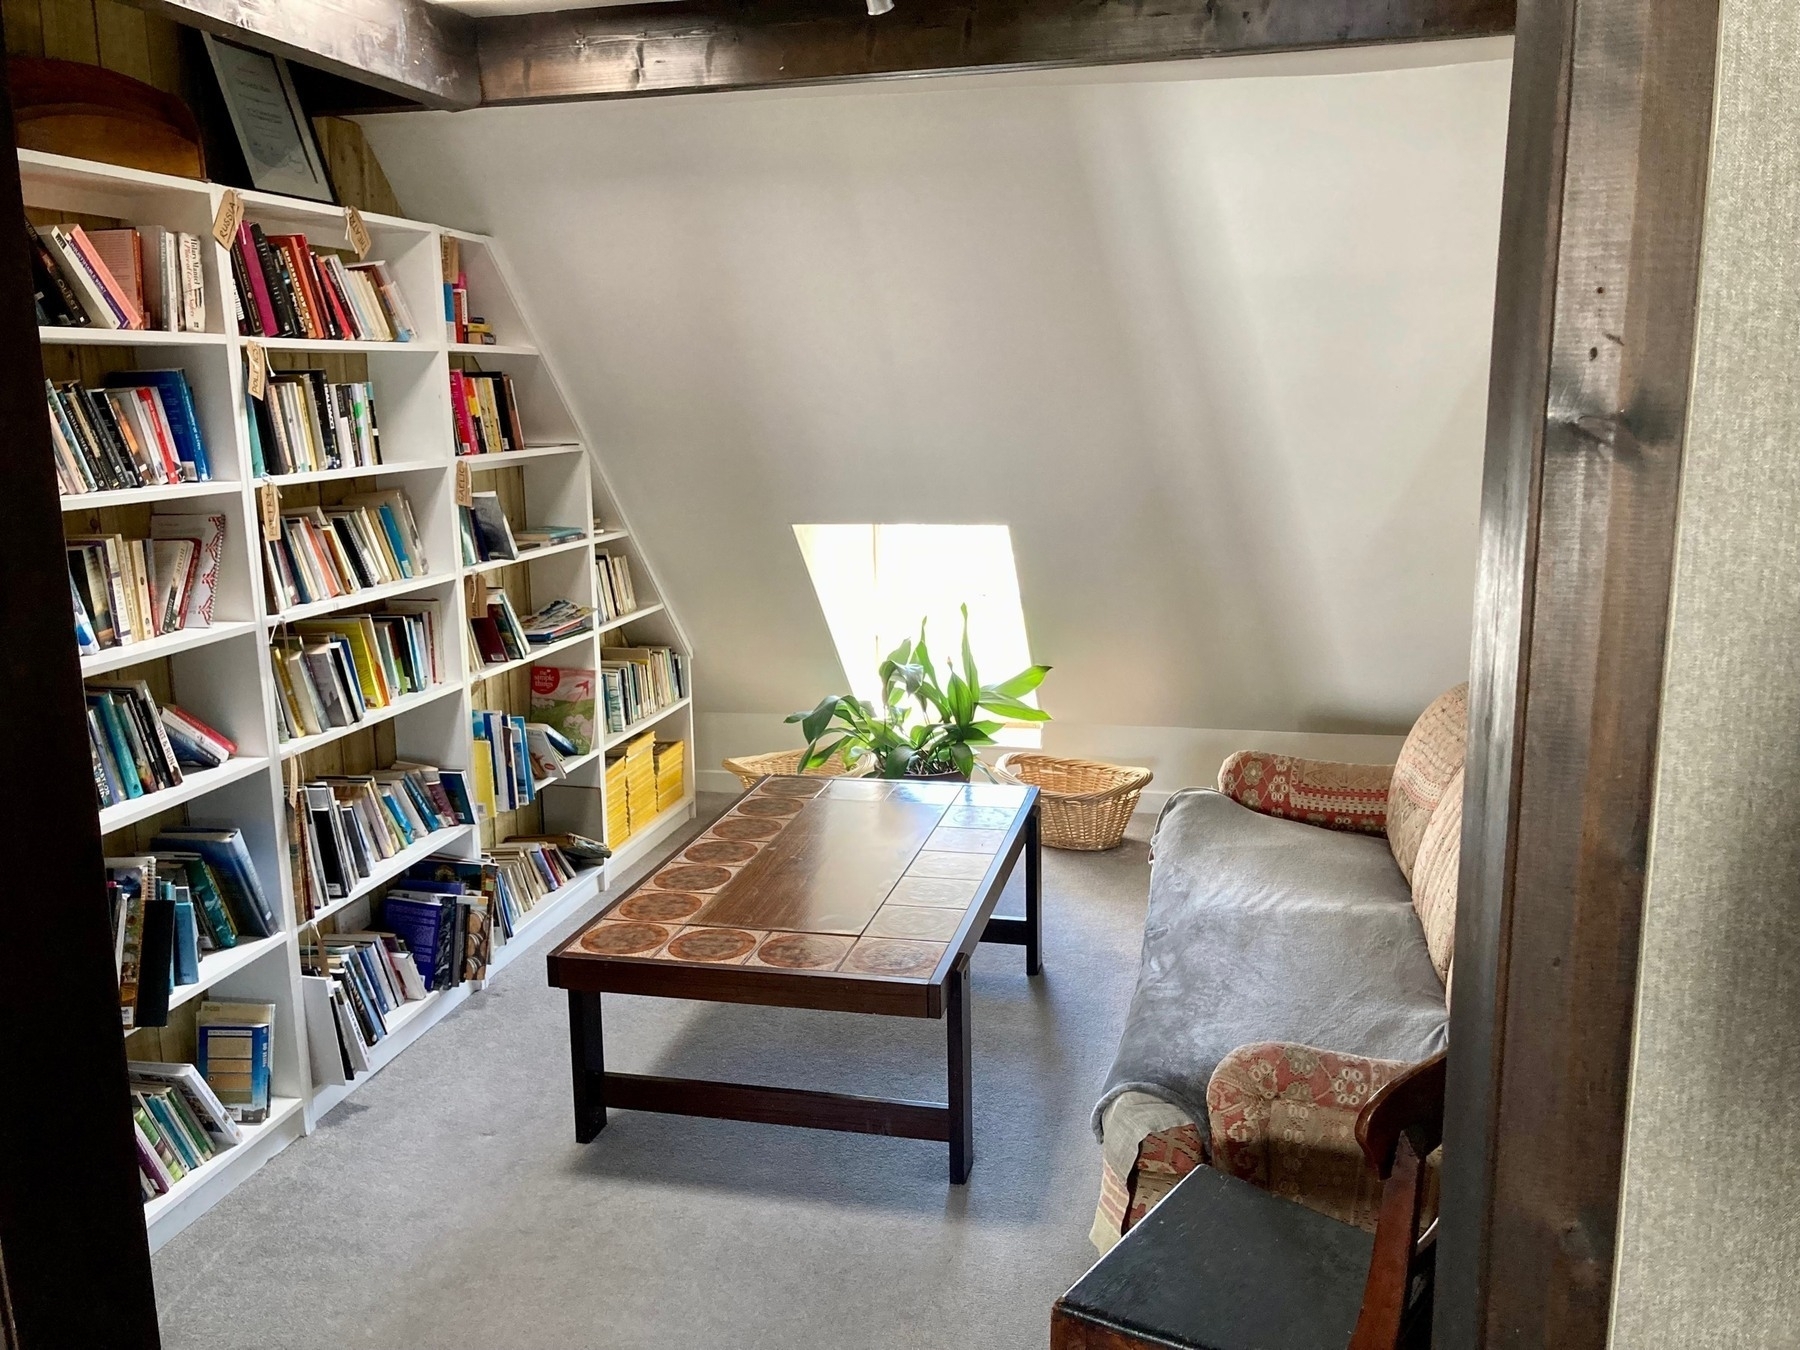
A little writing nook
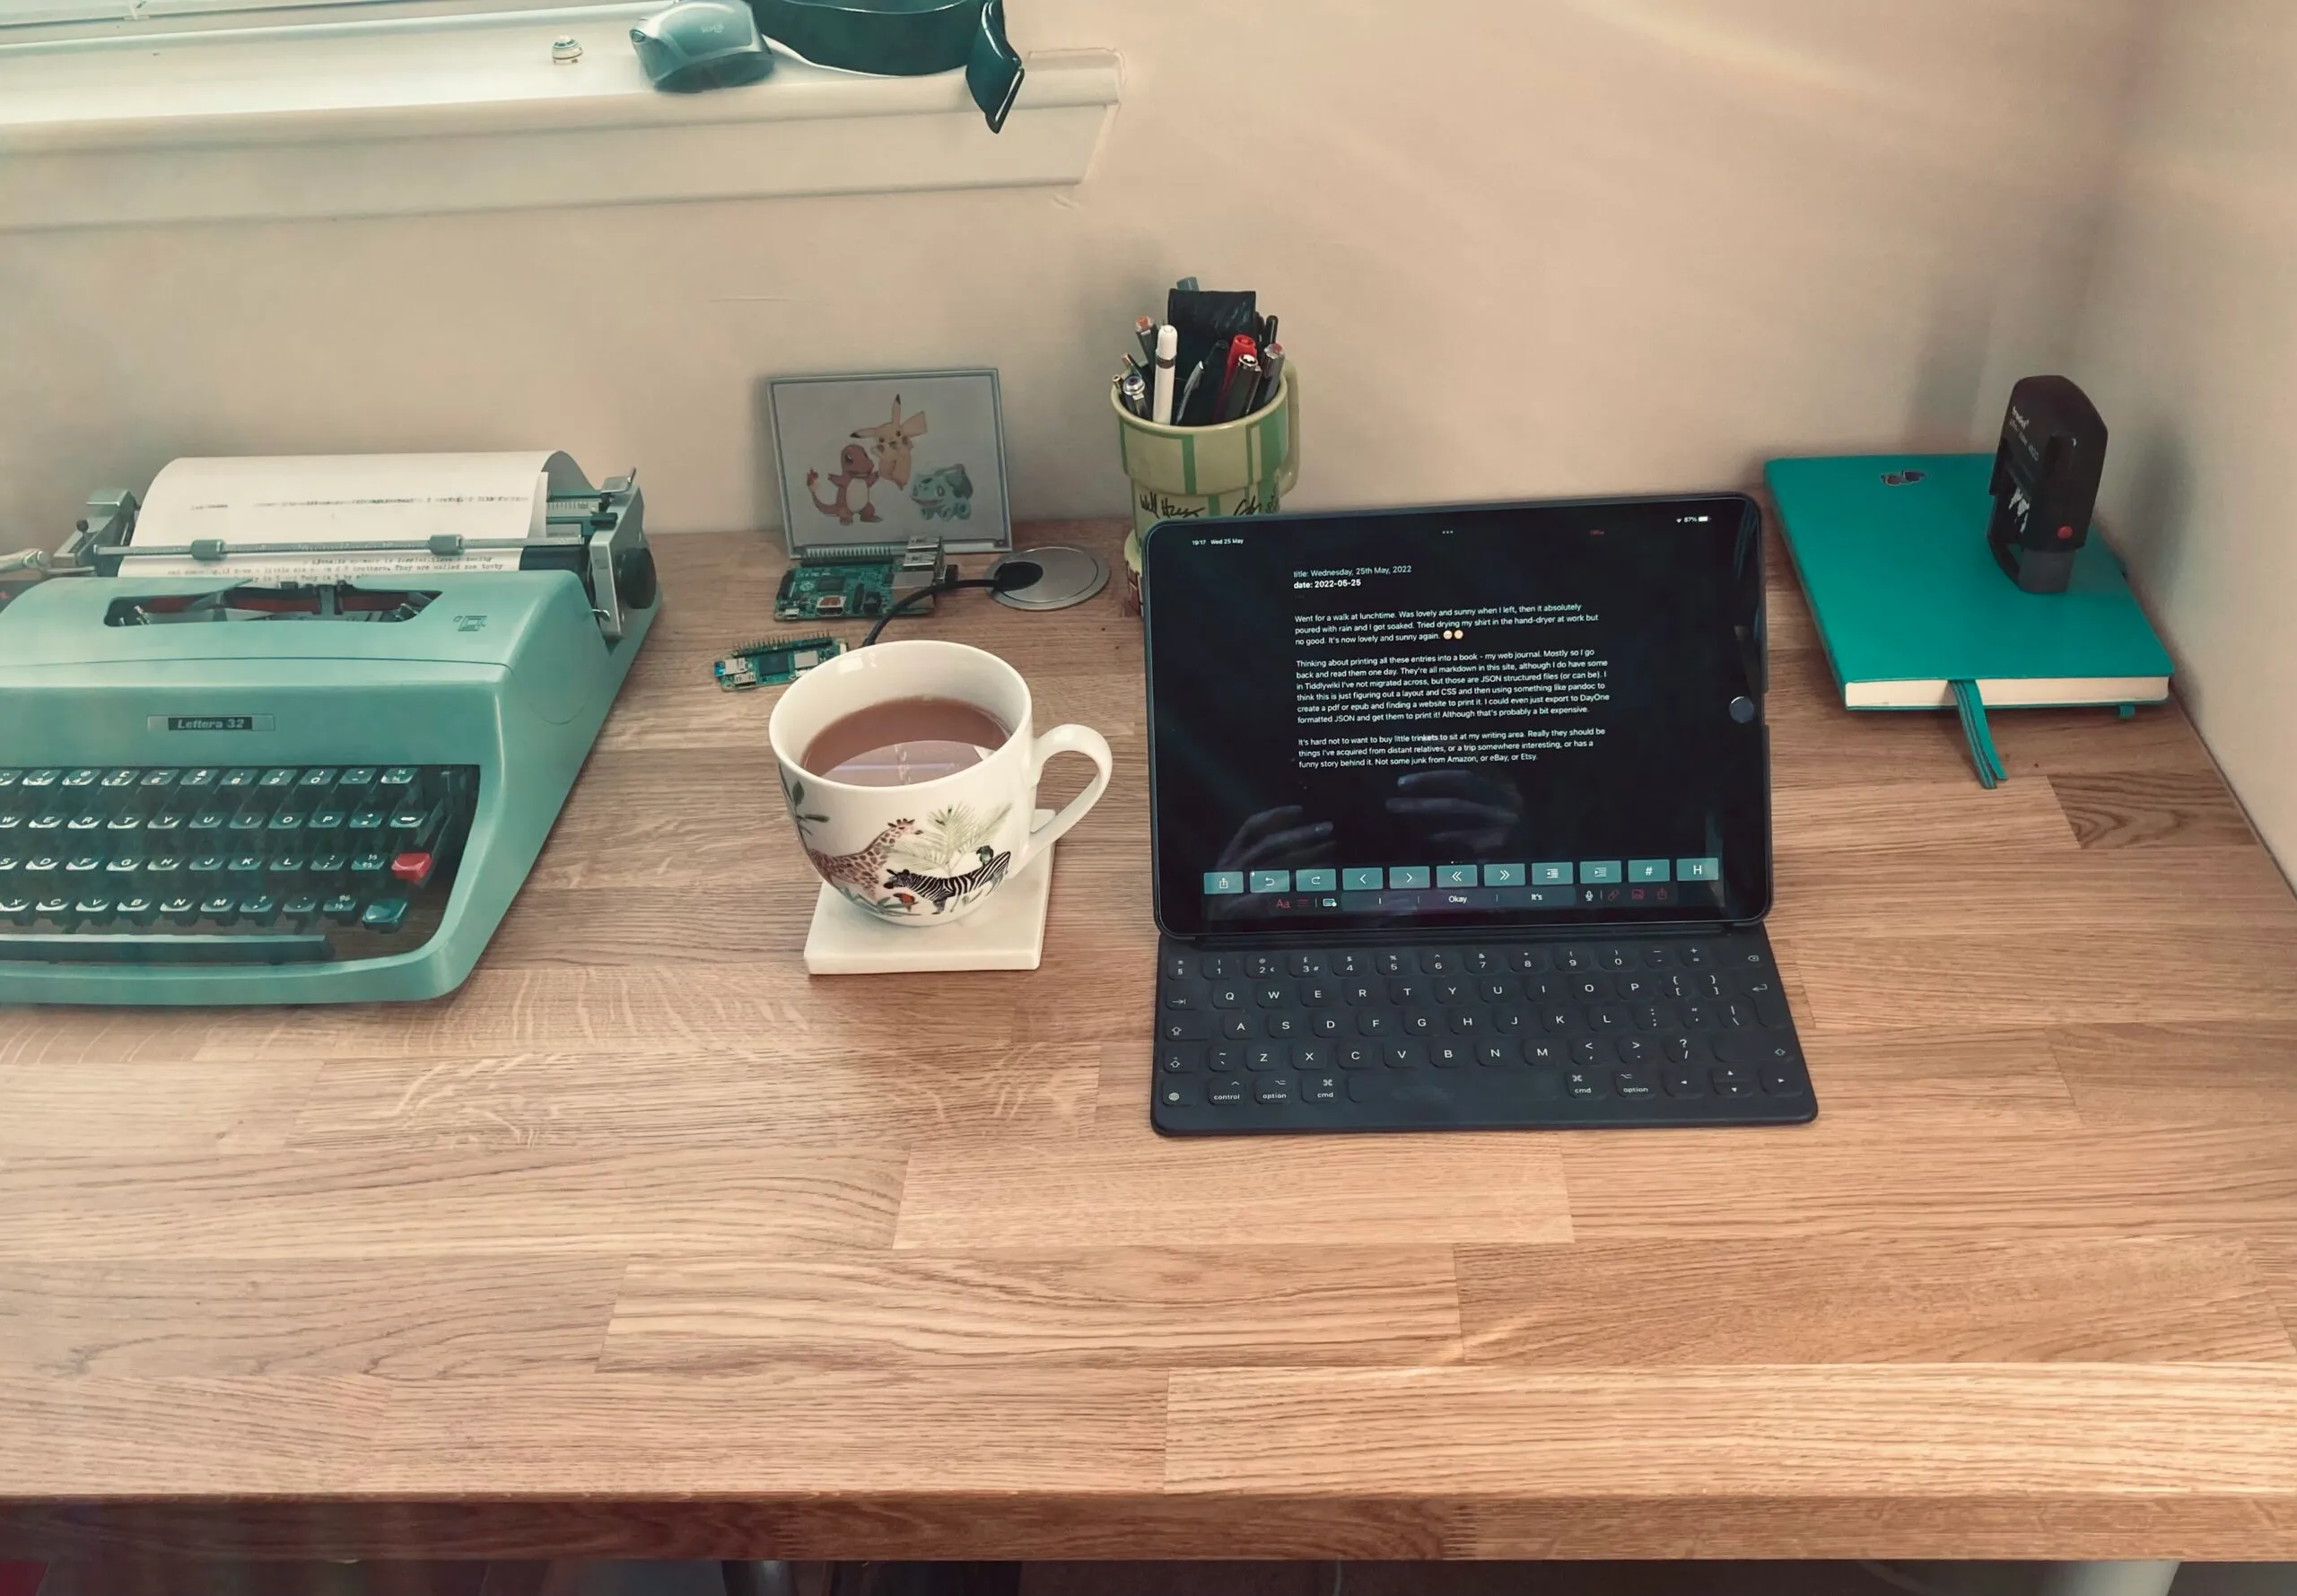 Desk with writing apparatus
As much as I love computers, it does turn out that you can have too many.
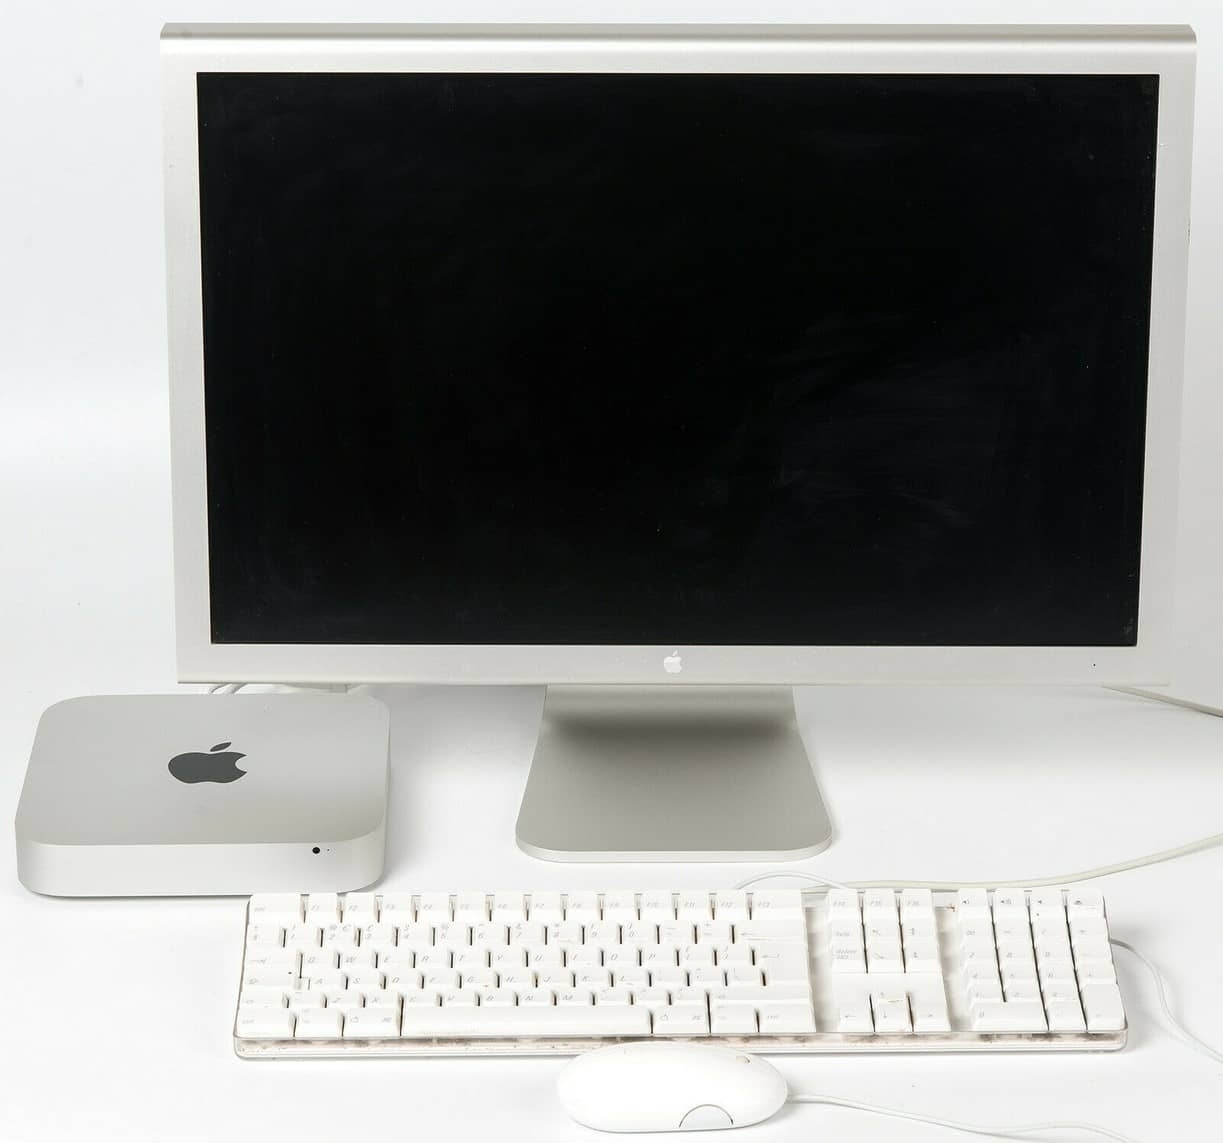
A while back I decided that we needed another computer in the office for when two people wanted to use a computer at the same time. Sounds logically right? I managed to pick up a good deal on a Mac Mini. It was a 2012 model but top spec and still very performant today. The only bad thing is that it’s stuck on an older version of macOS. I even installed a 2 TB SSD so I could manage all our photos on it. I figured it would be nice to utilise Apple Photos and iCloud and get everything everywhere and all the moments, and “on this day” etc. that it gives you. It would also be a nice computer for learning some JavaScript and other general software dev stuff. The final decider was that I’d then have DayOne on a desktop machine. DayOne being where we keep the family journal.
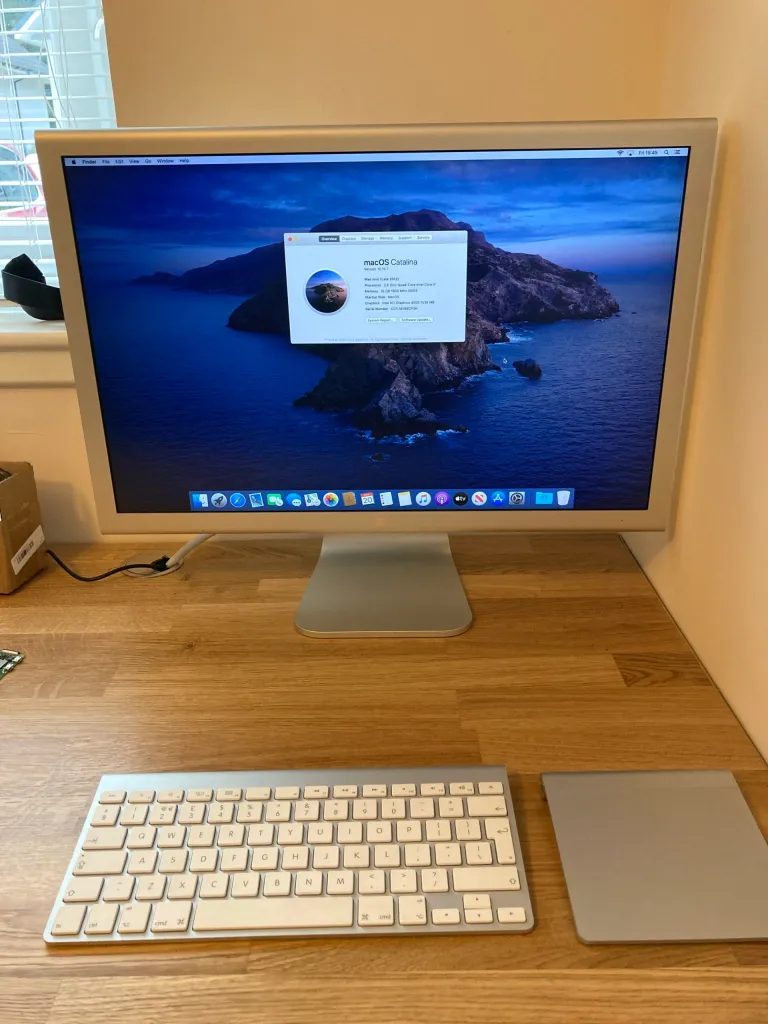 The Mac, with the heat generating Apple Cinema HD
It turns out that whilst that all may be very true, I’m unable to use a computer without wasting hours of time looking at random things online, and not actually accomplishing any of the things I’d told myself were the very reason I needed to get another computer. Maybe I did them some of the time but I wasn’t happy with it. I actually had two monitors and that made the desk look very cluttered as it came out at an angle into the desk top. Going back to the single monitor did make it look less overwhelming but it still didn’t change the fact that this extra computer was really one too many. We have five computers, and three raspberry pis, and a flock of iPads and Amazon tablets. I could probably manage without it.
 Analogue mode: Expert
So now it’s packed up and ready to be sold (as long as I’m certain) and the space cleared out. Originally I planned to just use it for paper, whether by pen or by typewriter, but I’ve actually found it’s a nice spot for the iPad with the Smart Keyboard. I recently had to wipe and reinstall iPadOS as it was having issues and because of the issues I didn’t want to restore it to how it was and just added apps as I went along. This meant it was quite bare. I tidied up the Home Screen and am trying to keep it limited in scope. It’s still just as easy to waste time on Reddit or the internet on the iPad as much as a desktop!
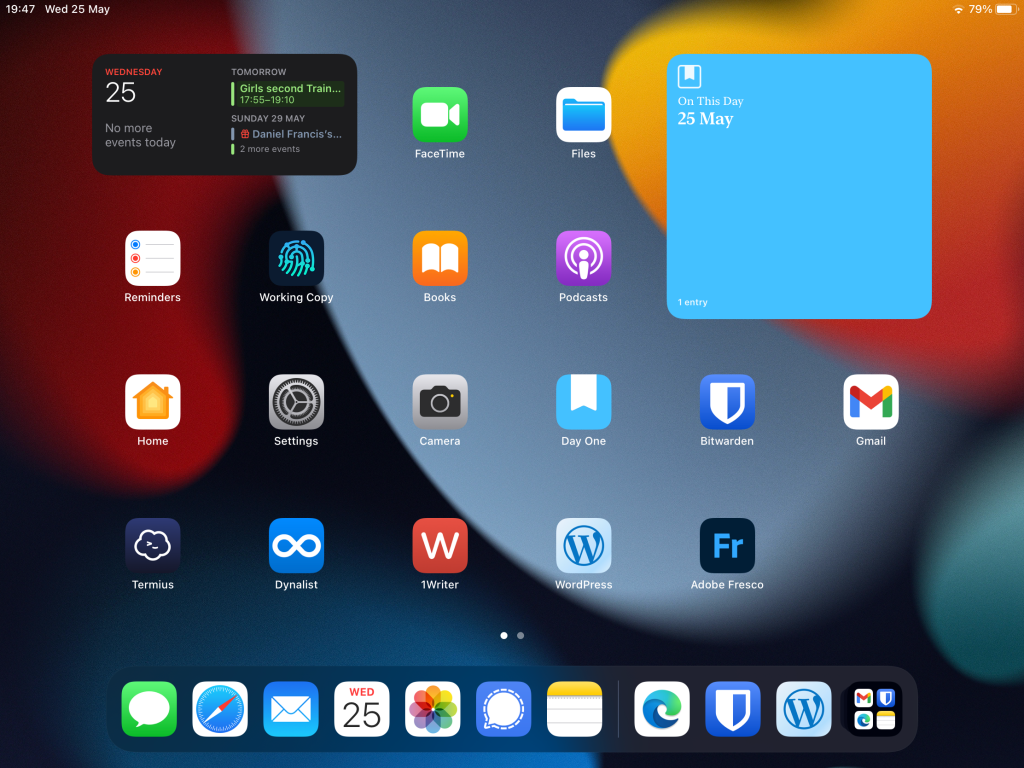 Trying to keep it simple
I have my main writing apps with 1Writer, Day One and WordPress. A few utilities, dynalist for lists, Fresco for my daughter to draw, and the Day One widget so I actually see some of the older entries without having to do anything. The second page of the iPad is some streaming apps and misc. things I use occasionally or if I go away.
Even though I have a web browser, I’m less drawn to it on here than either dedicated apps or the browser on the desktop. Generally there aren’t apps on the desktop so it’s always the browser. Just these few small hurdles to overcome seem to be enough to stop me wasting away time and actually doing the things I set out to do in the first place.
I still get sucked into random websites and whatever, either from emails or links people send me, but it’s usually not the default starting place it tends to be with a desktop. Plus the other fact of when I feel like pen and paper or typewriter, the iPad is small and easily moved out the way.
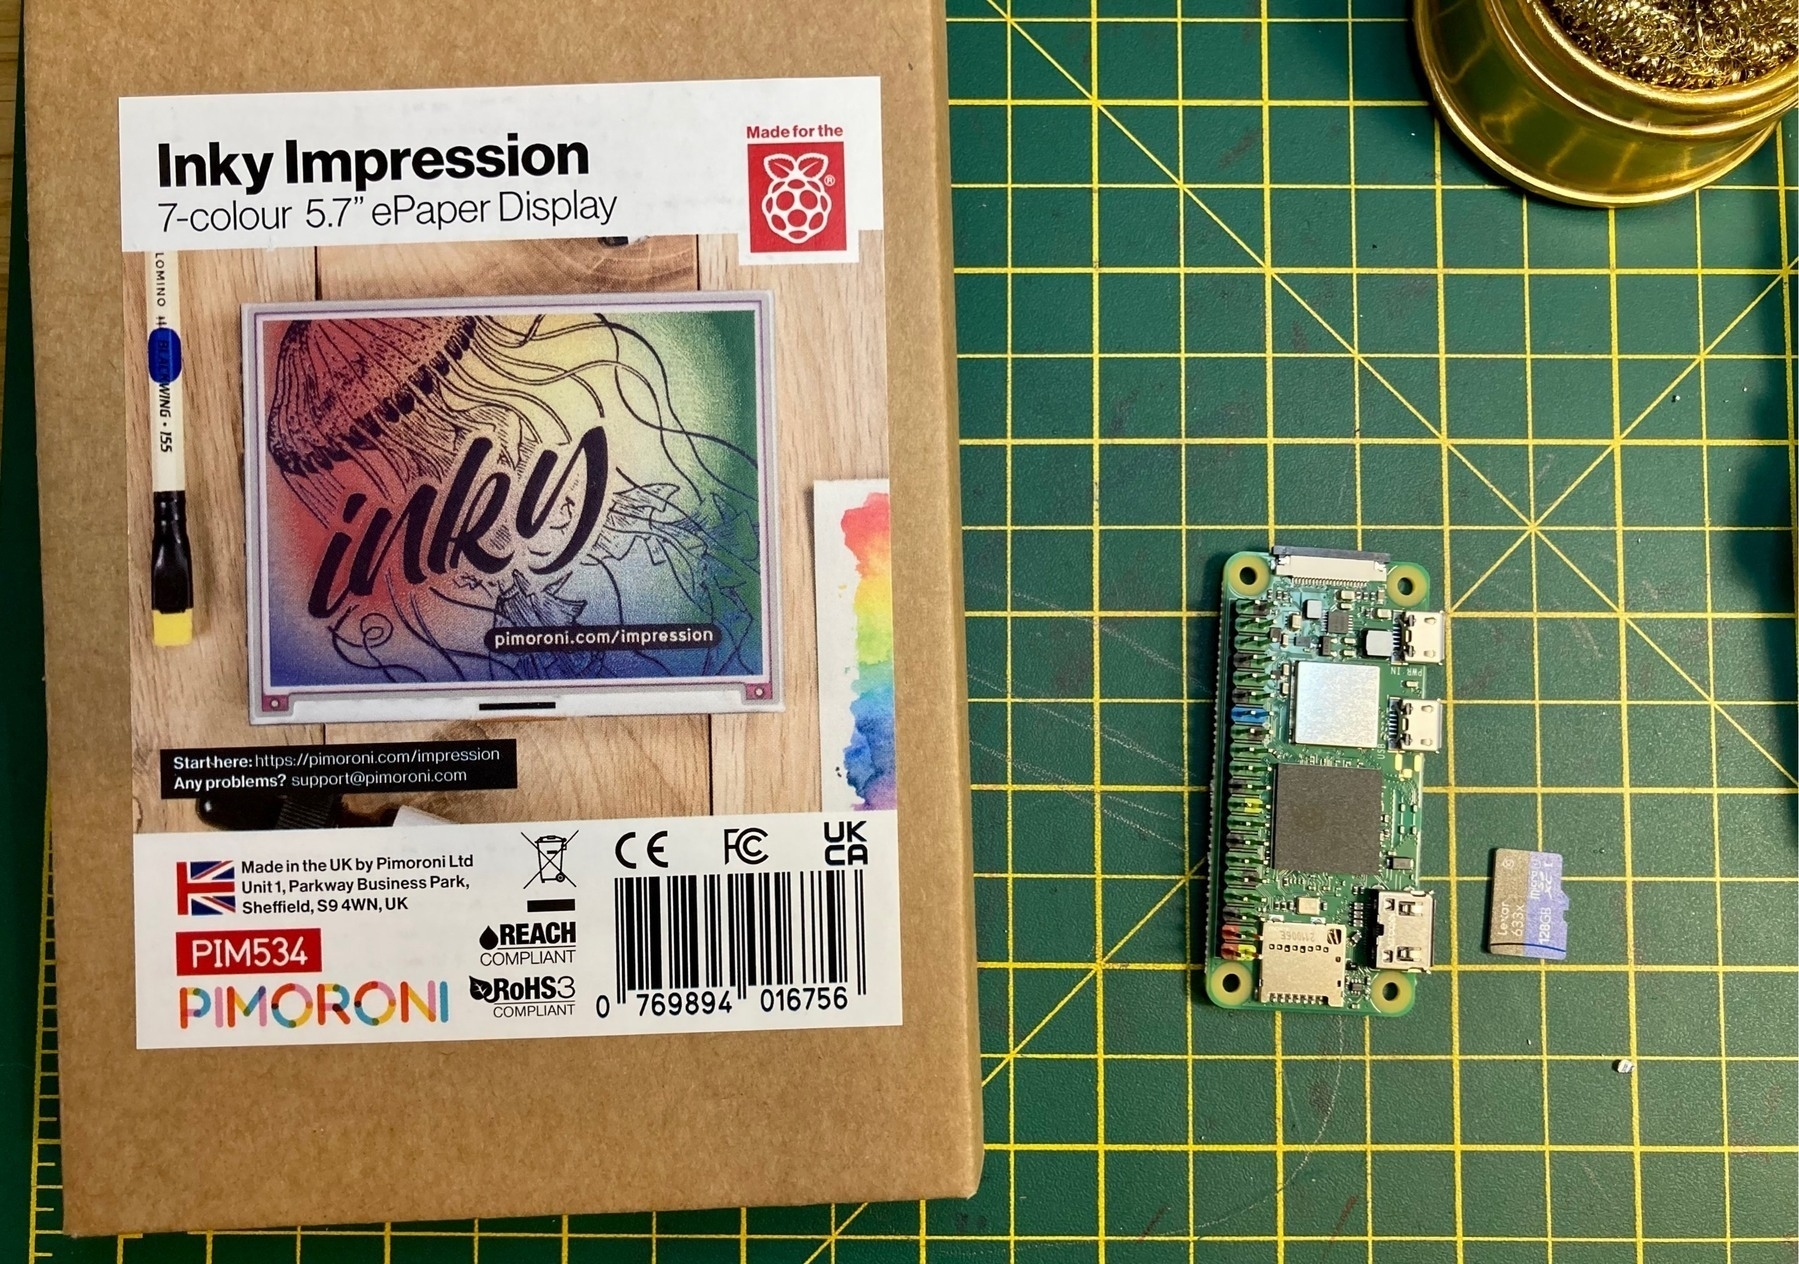
I should sort out my e-ink screen and have something interesting show up on that whilst I sit here.
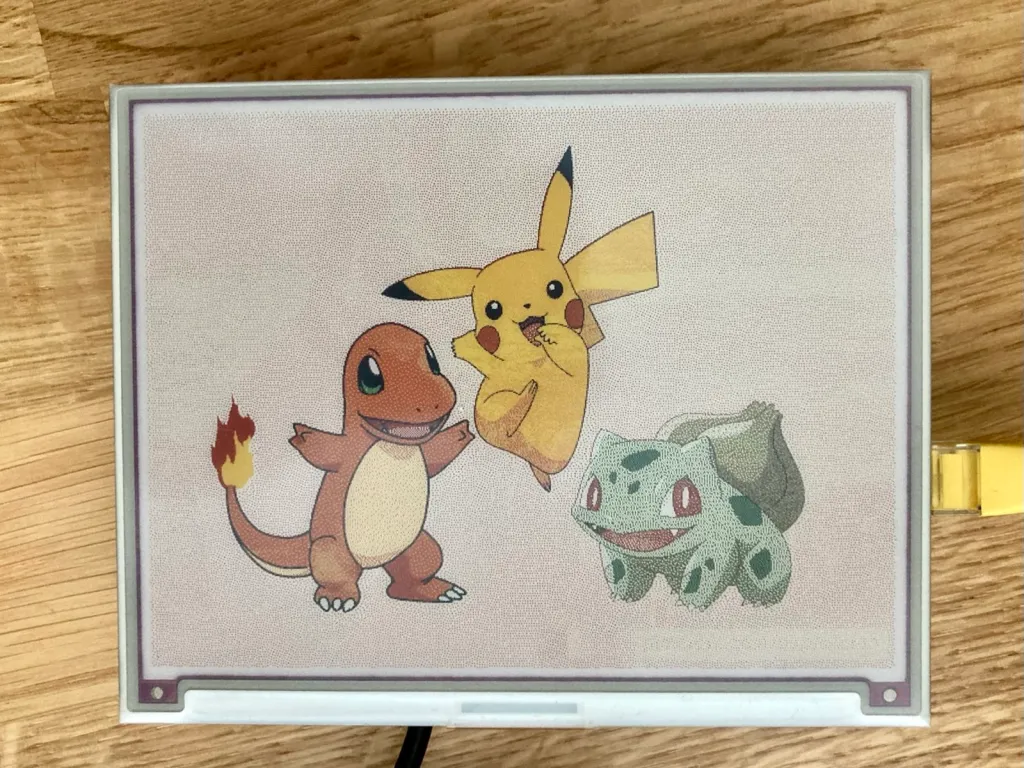 Colour e-ink is fun!
A new keyboard
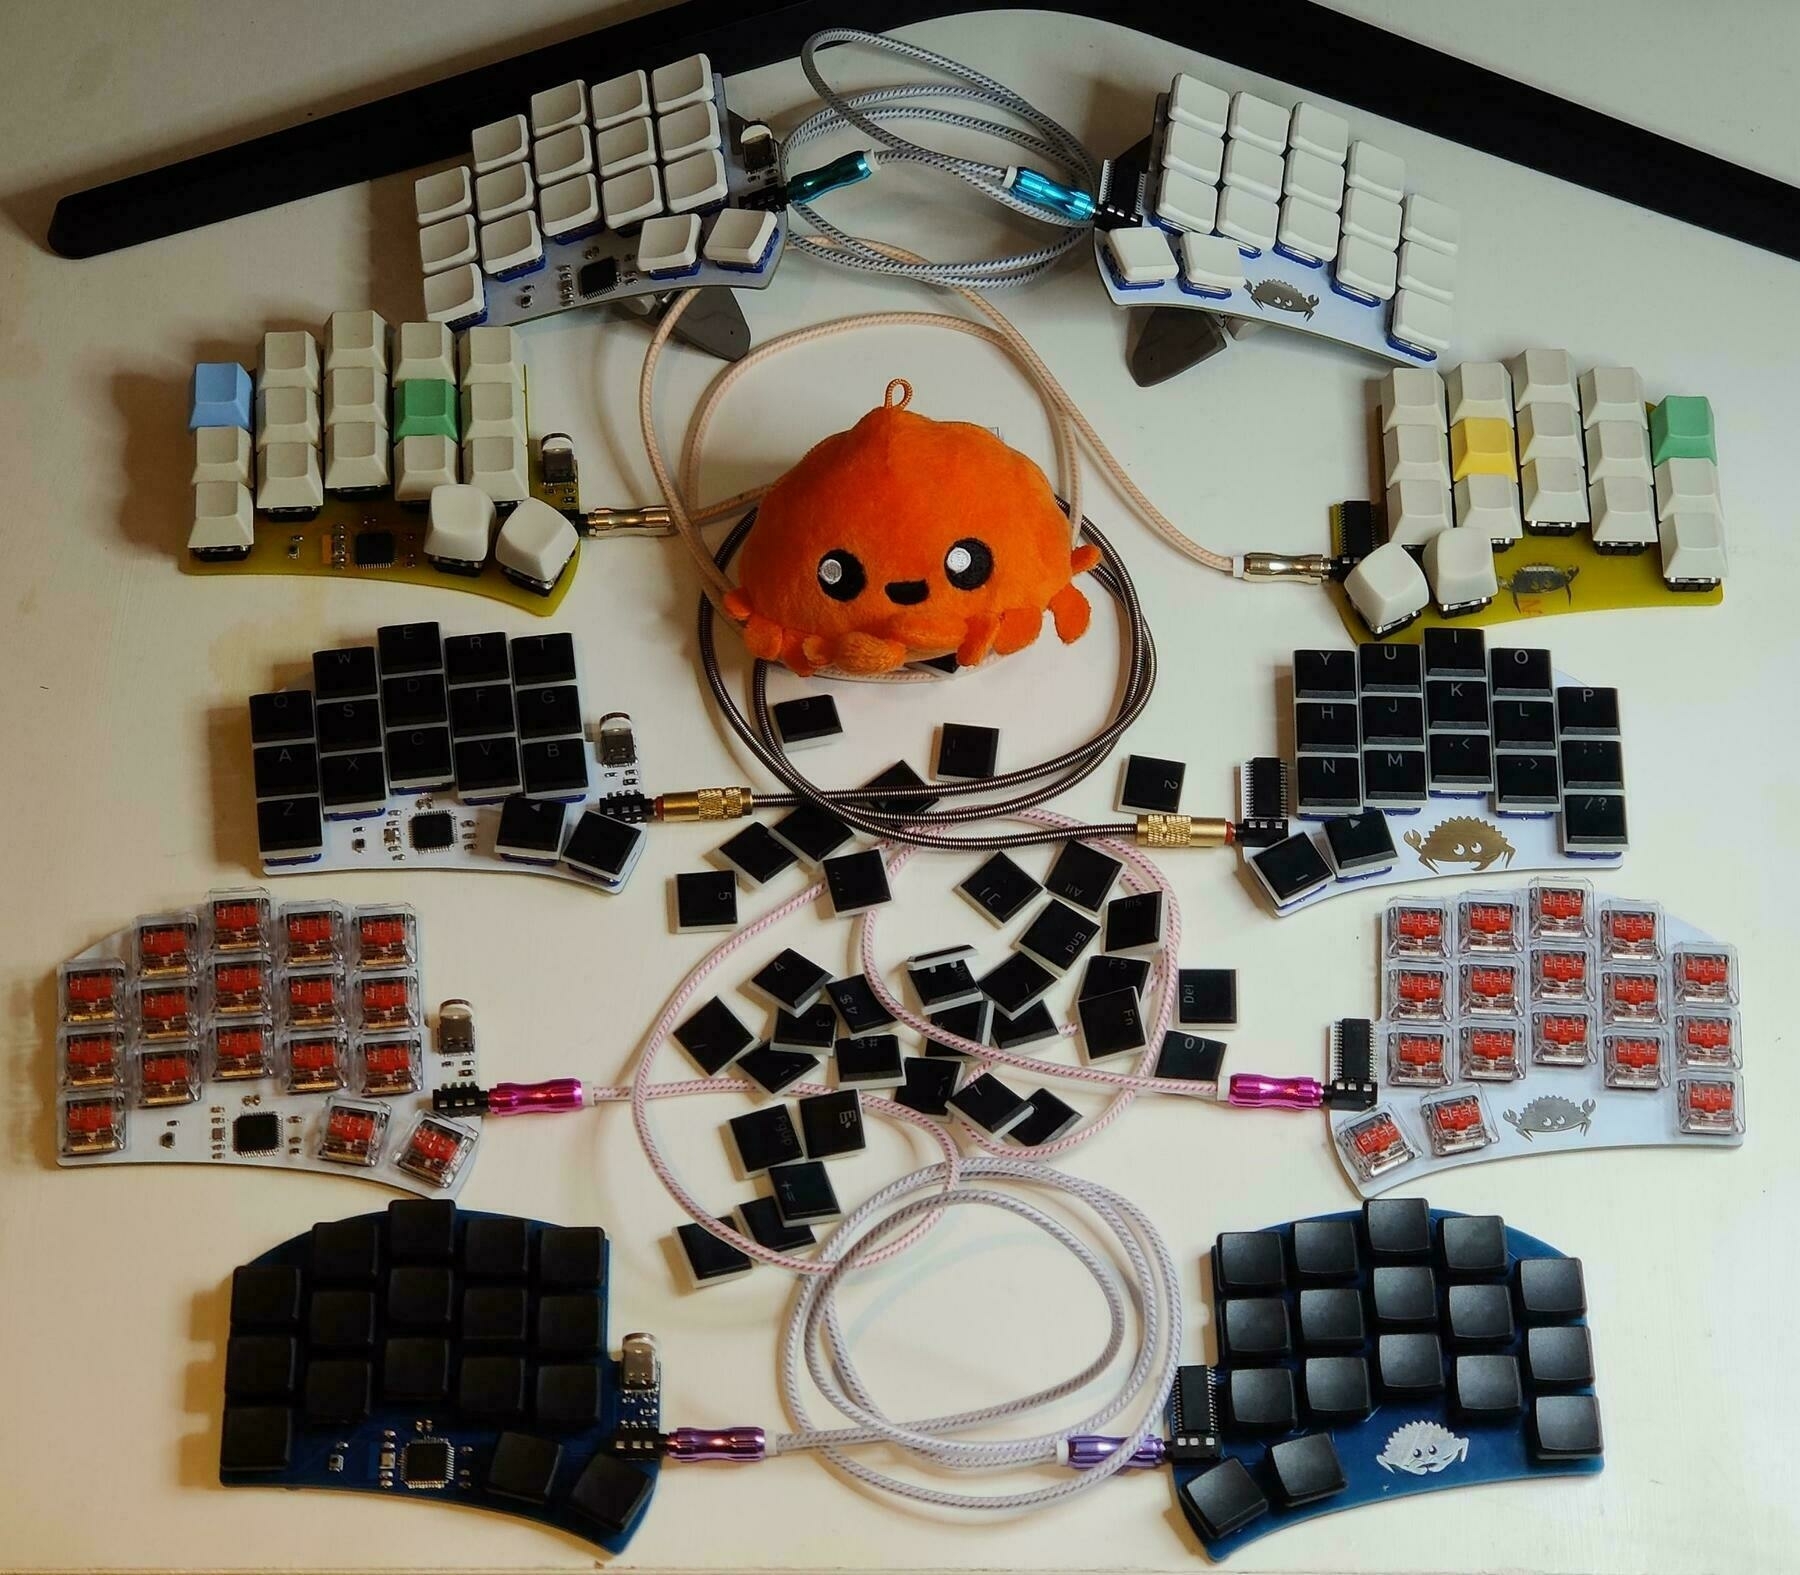
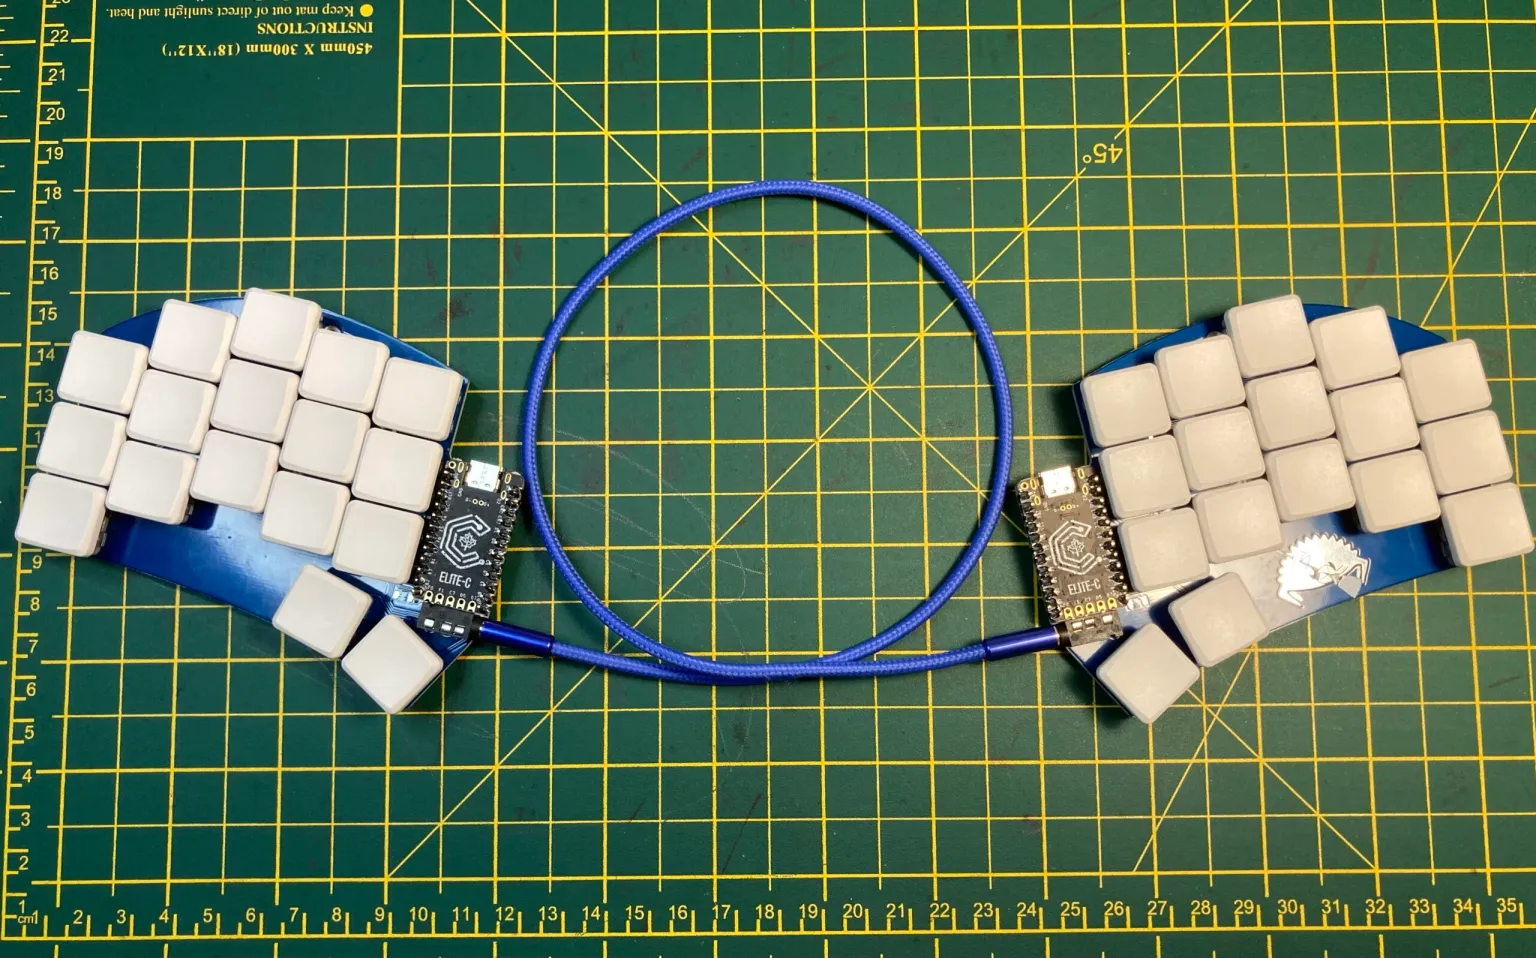 The finished product
It’s been a long time since I last built a new keyboard. I think it was Christmas time 2018 when I bought the Iris keyboard as the store had a sale on. Funnily enough that was a split keyboard. I keep meaning to write up a post about all my mechanical keyboards (there’s been quite a few over the past nine years) and I’d enjoy going back and remembering what I had.
Mostly what happens is I buy a new kit or PCB thinking it’ll be the end game (after much research), build it, configure the layout, generally mess about, and then stop using it. After a few months I end up selling it online, probably to fund the next one. Building is a fun part of it, so perhaps nothing wrong with this cycle. Will this next one be any different, or have I just been distracted by film photography and other things the past 3-4 years?
 Five blue PCBs
The Ferris Sweep
That’s the name of the new keyboard I’m going to build. A friend sent me a video of it a while ago and I decided I absolutely needed it. It’s a derivative of the Ferris keyboard, but instead of various individual components on the board, it makes use of a microcontroller. This means it’s a lot easier to build and microcontrollers are pretty common across mechanical keyboards. There might be some other changes too but I didn’t spend much time looking at the Ferris.
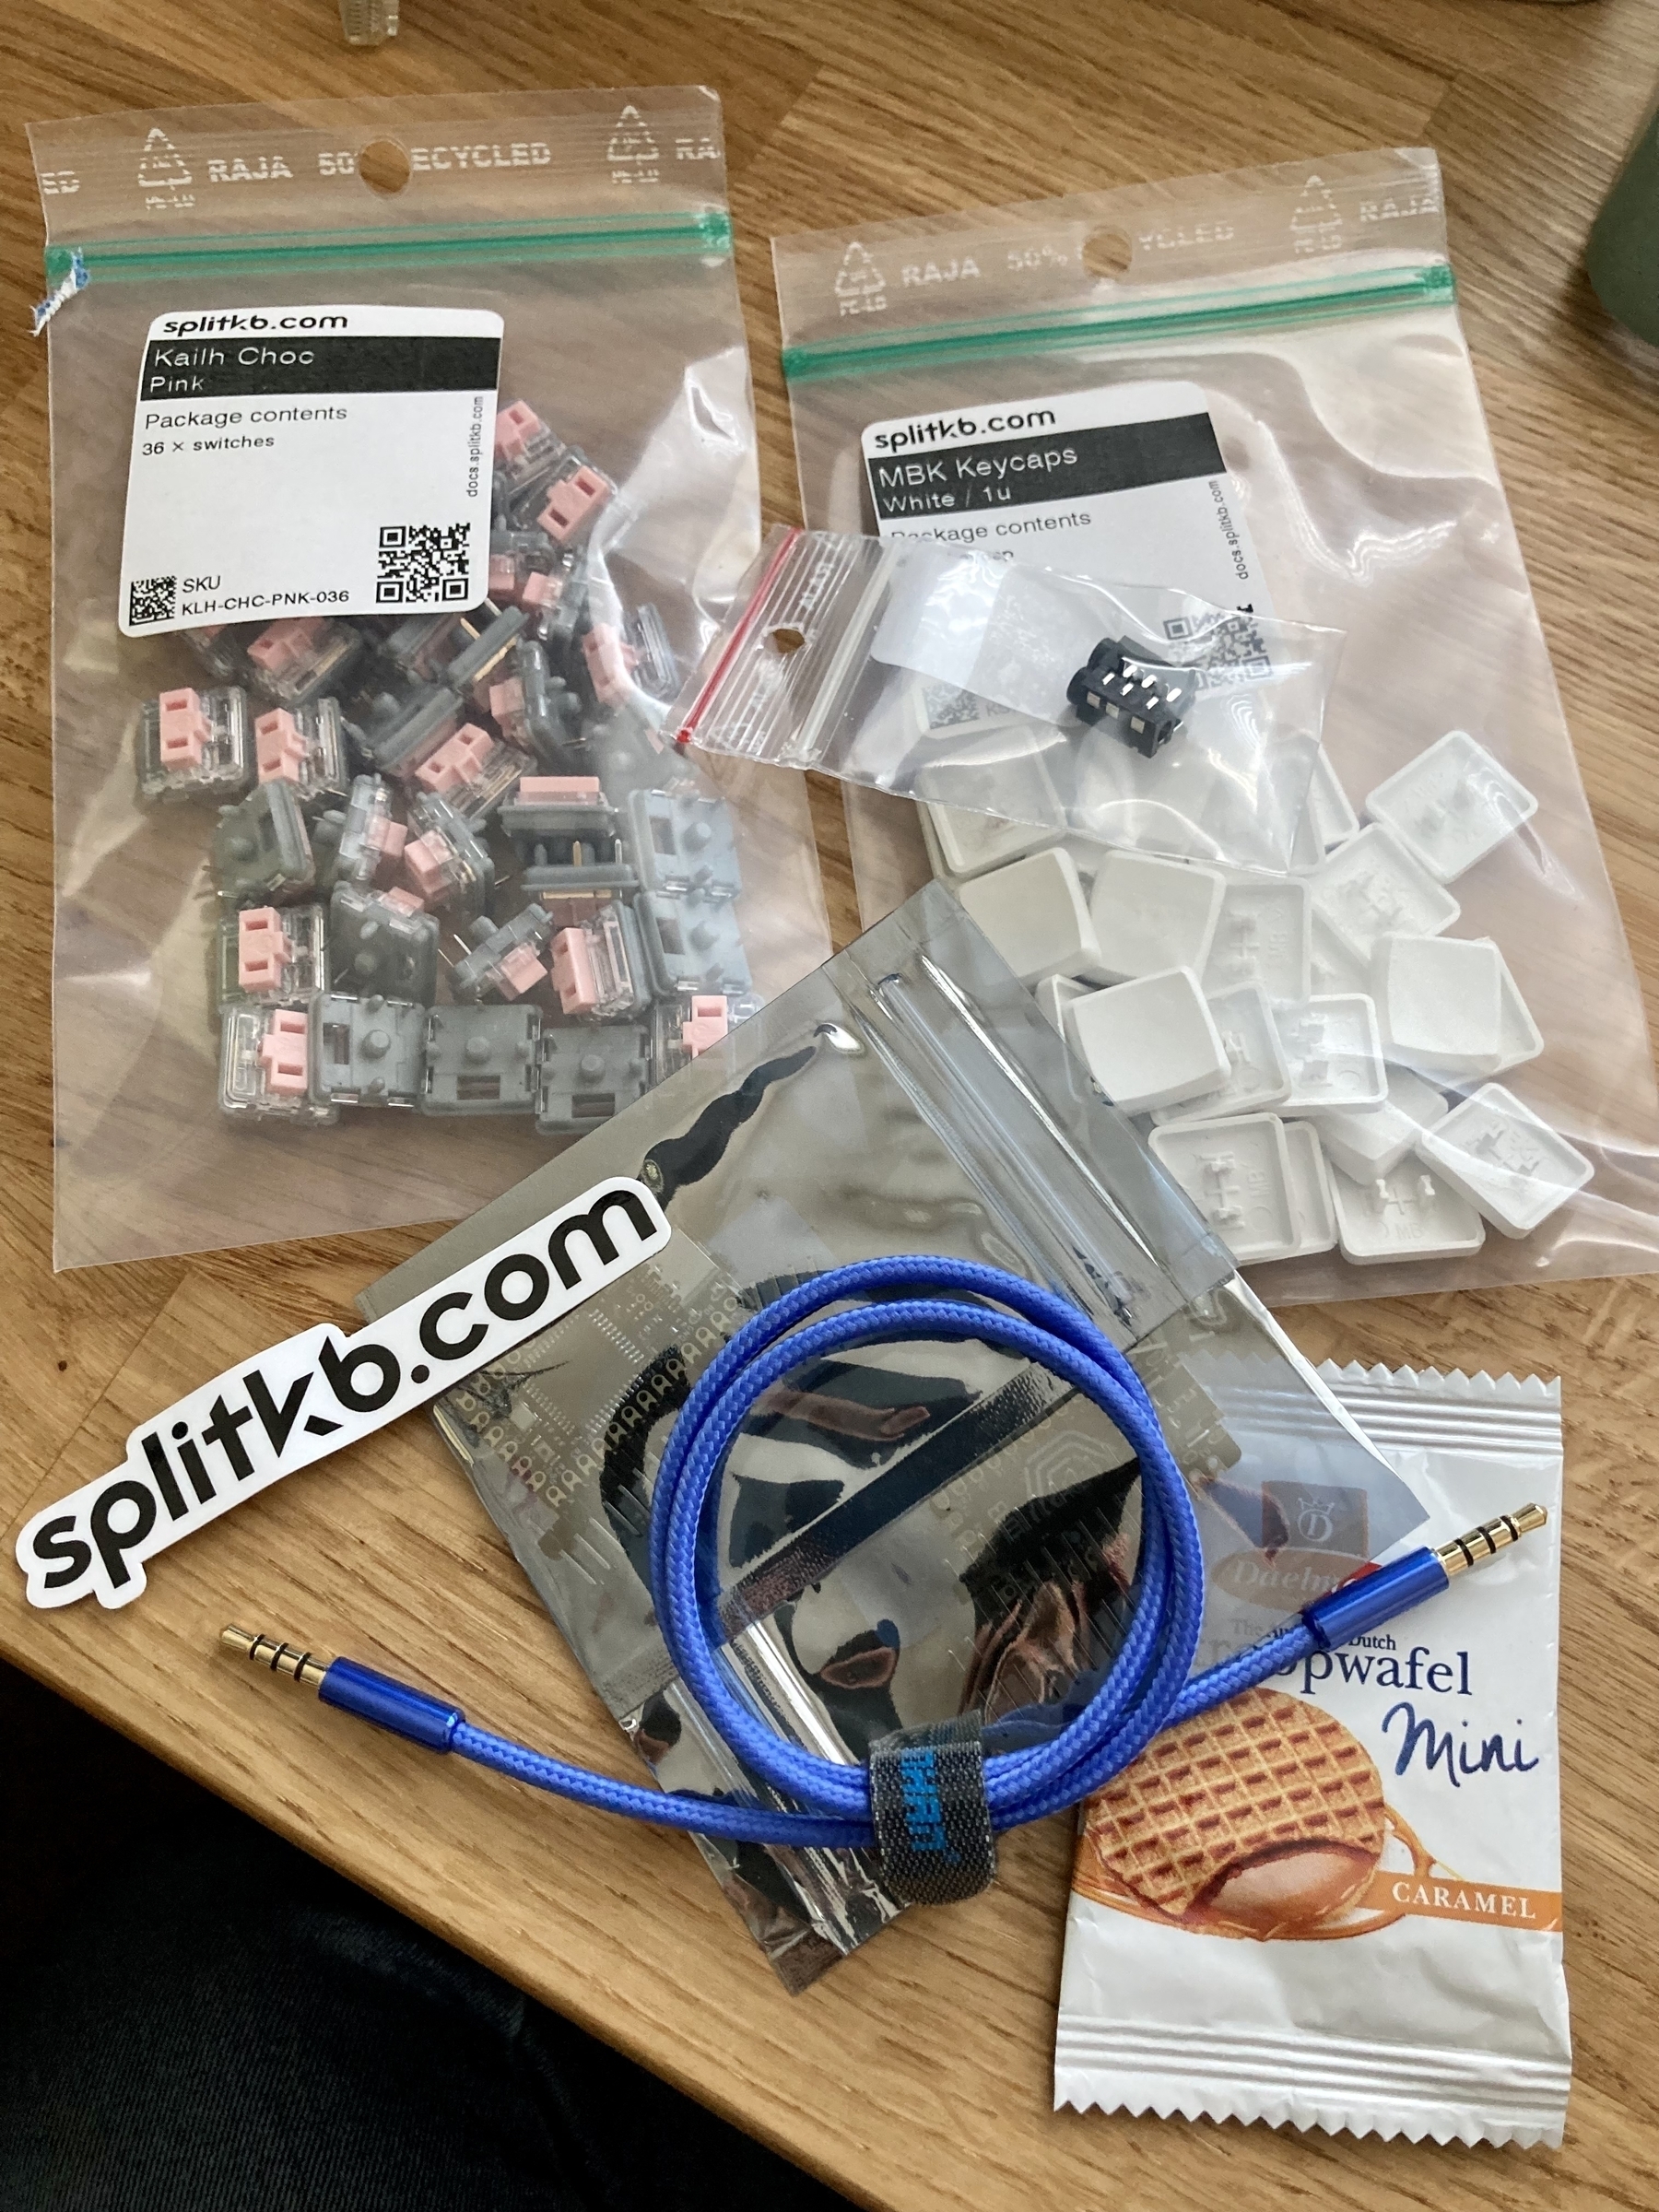
The final parts just arrived and so I’ve yet to build it, the featured image is one like what I’m going to build but I went with blue PCB and white keycaps. It was pretty easy to source, the Github repo has a .gerber file which you can upload to a PCB manufacturer’s website and they’ll print them off for you (minimum of 5). It’s remarkable, and pretty cheap — $20 for 5, and then $15 for postage and taxes. Unfortunately that’s where the cheapness ends. Now this is by no means an expensive keyboard on the scale of mechanical keyboards, but it’s not nothing. The rest of the parts — controllers, switches, caps, etc. — soon add up and whilst there are a lot of stores that sell these parts, not all of them have everything you need — least not ones in the UK. I ended up ordering everything else from splitkbd.com. This store is based in EU and does have excellent stock — just it’s a €25 postage, so make sure you have everything you need!
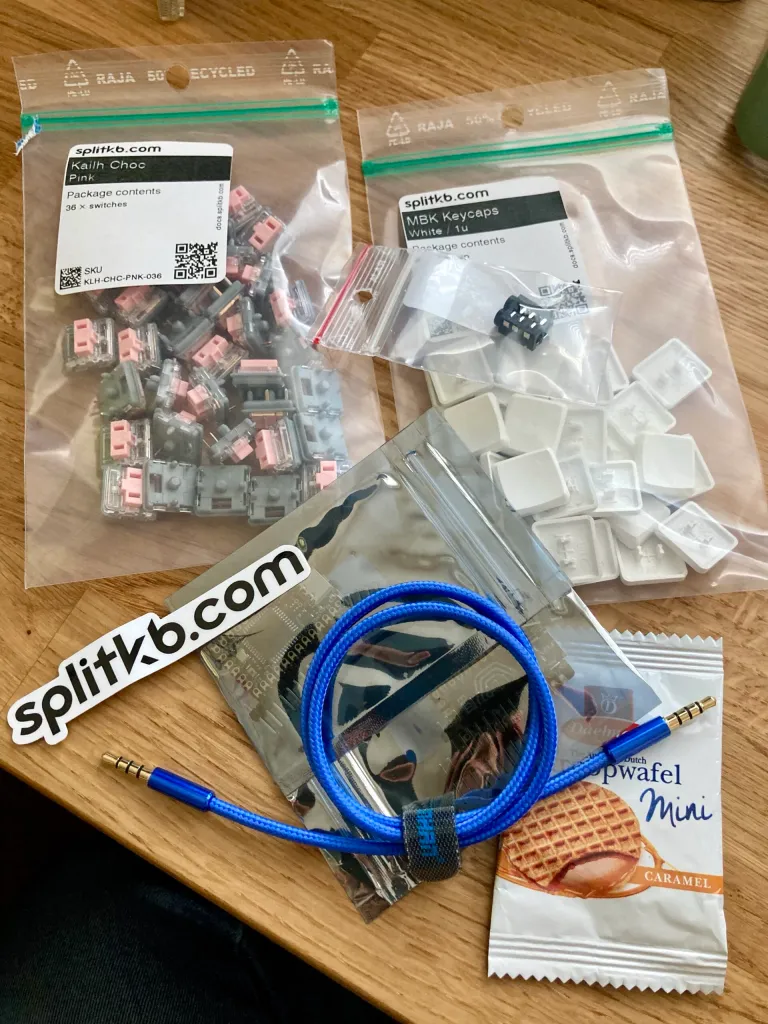 Everything else you need
I went with Sweepv2.2 and pink Kailh choc keys, these are the lightest pressure ones. The next thing will be to solder it all together, flash the controller and get typing! Well, try typing. Making a new layout will be the longest part, likely involving many iterations if I truely want to stick to it.
Will I stick with it? You never know! 😅
Update 31st July 2022
I build it, flashed the stock firmware and tested it out. All but one key works. Probably need to check the solder. However, that’s as far as I took it from back in May. It’s sat on my desk reminding me that I wasted money on it. I have just sold one of the spare PCBs on ebay, so that gets a little money back. I’ve forgotten how much I did spend, maybe about £90 in total.
I have a photo in an actual gallery
If you visit the Fujifilm House of Photography in London, somewhere on the walls you’ll find a photograph that I took. Afraid it’s been taken down now, and lives at home with me!
 Tehachapi at night
I had some friends who were keen to go astrophotography shooting and invited me along one evening. We drove out to the mountains and tried several places to take pictures. Prior to going I’d done a little research into how you actually take photos of the sky at night. At the time all I had was the Fuji X100F with it’s 23mm f/2. This turned out to be a good lens, it’s fast and wide-ish. If I had the WCL that would’ve made it a 18mm f/2 and perhaps even better, however, I didn’t so I just used what I had.
We took quite a lot and it was hard to tell if anything was good or bad or what. This particular one was taken near the main highway just off some side farm road. It was so dark I couldn’t see anything and just aimed the camera on the tripod in the general direction. I probably couldn’t have lined up the telegraph wires better if I tried! This was back in 2017 and we had a good night and finished it with a stop at a MacDonald’s on the highway for hot chocolate. I also got the photo printed to give to one of my friends who went with us that night as a leaving gift.
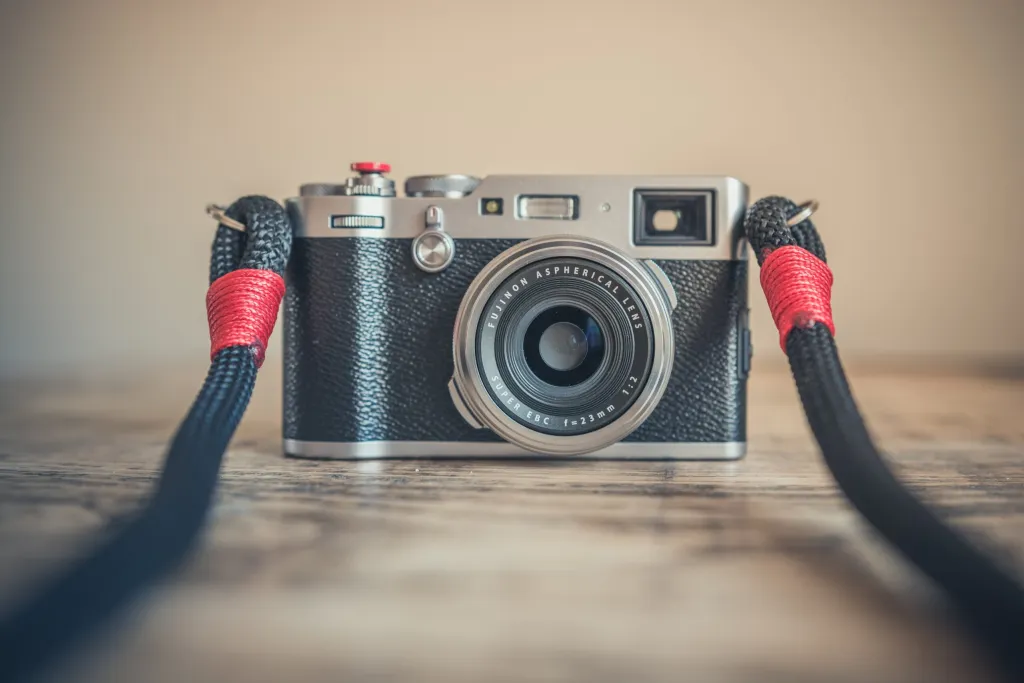 Fujifilm X100F
Fast forward to September 2020, and Fujifilm announced the 10th anniversary of the X100 series competition. You can submit any photo as long as it has been taken with a X100 series camera. As most of my photos are of family and friends, I didn’t have too many that might be suitable and this astro shot was the one I immediately thought of. The first prize was a brand new, shiny X100V. They had multiple first prizes for different regions, so I wasn’t competing against everyone, just everyone in the UK!
The following February I got an email saying I was one of the 10 runners up! Woohoo! 🎉 (although would’ve been nice to win the camera given I’d just recently sold my X100F and was missing it a little bit 📷). My prize was a nice tote bag, and a hand written congratulations note. The other part was that they would print and display the photo in their gallery.
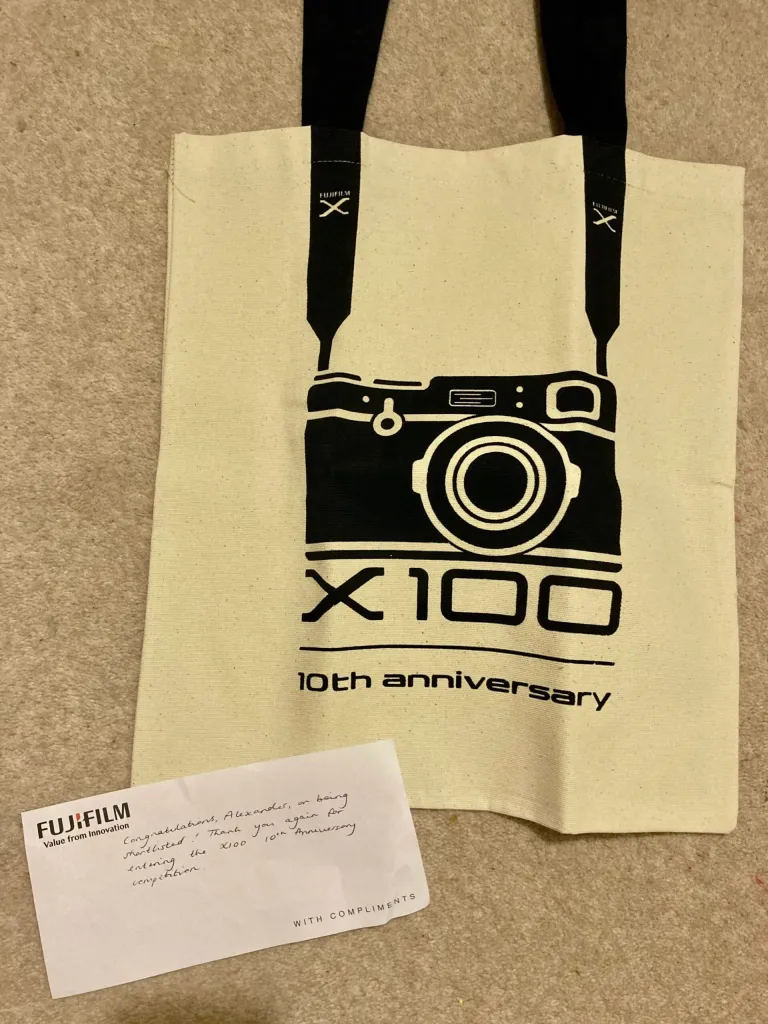 The Prize
Except then COVID had locked everything down and they decided to postpone it a few times. However, now the gallery is open! Unfortunately, I live a long way from London and I’m not going there any time soon, so I won’t get to see it in person. They have offered to post it up to me after the exhibition, so that’ll be nice.
The Fujifilm store looks like a nice play to go if you like photography and cameras, they always have gallery one and no doubt lots of toys to play with.
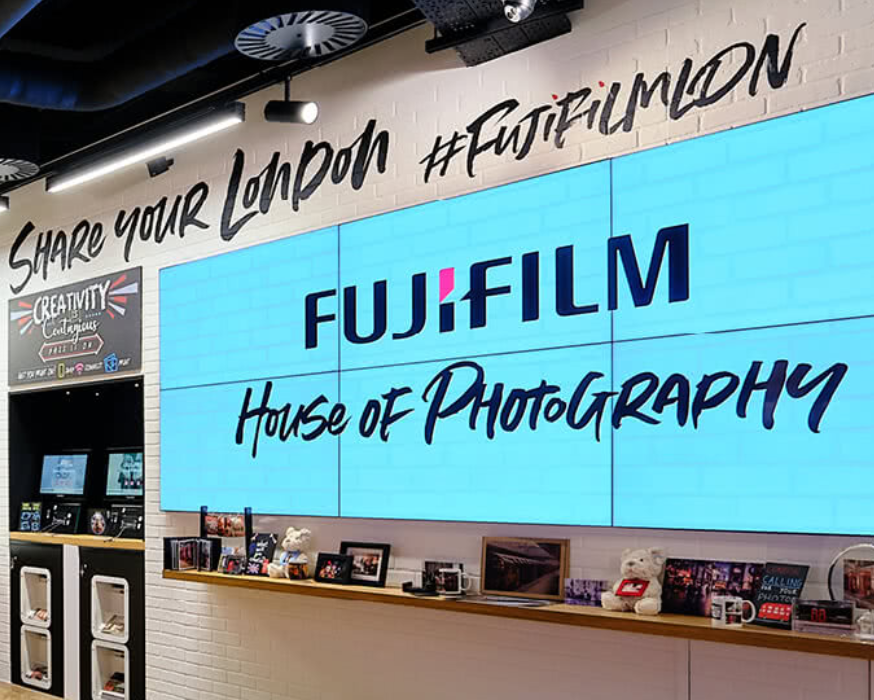 House of Photography
I believe it’s was open now until 30th June 2022. Have a look at their site.
Update: They’ve since posted the framed version to me at home. Now I just need to decide what I’m doing with it.
The parts are here…just waiting on the PCB 🦀🧹
Upgrading my T490 to 1080p
A while back I decided I needed (yes, needed) another laptop. I do have a Thinkpad T450s already but my daughter has pretty much taken it completely and uses it for school work. So I went on the hunt for a new one. I wanted it to have USB-C so that I could use my existing dock and setup at home that I have from working at home with my work laptop.
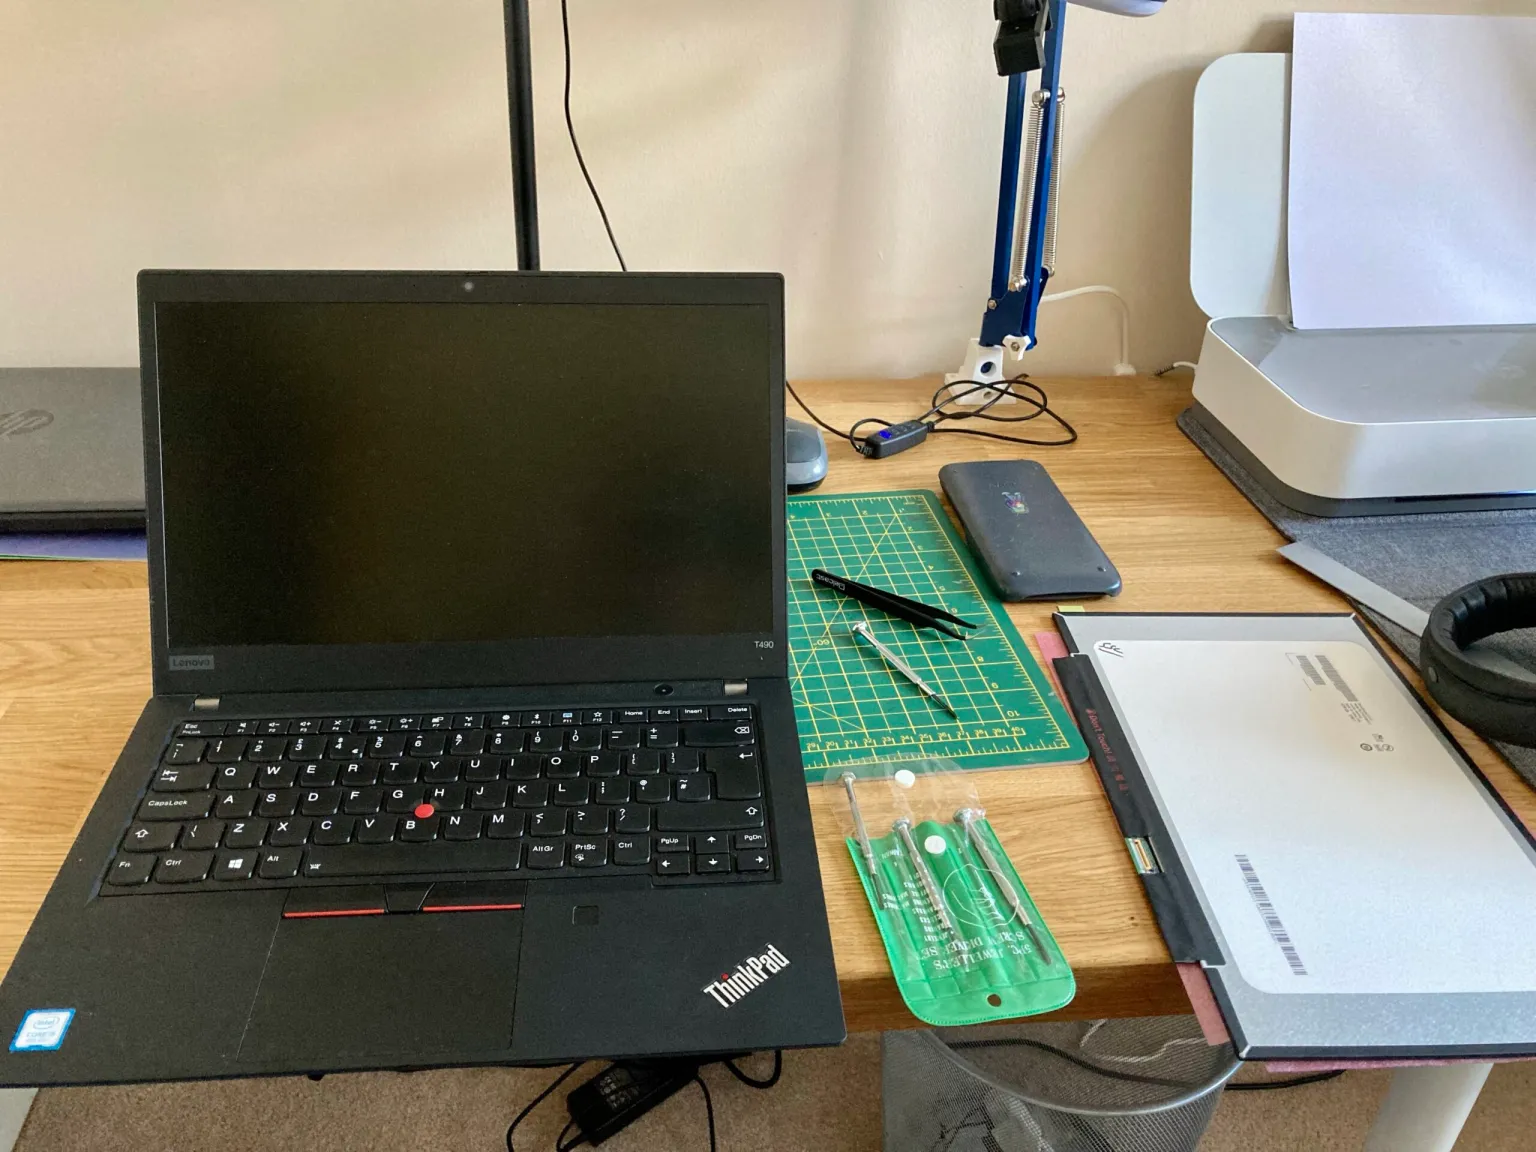 Prepare the work area
I started trying to figure out which model was the oldest I could get, but then saw that I should try and find one with the 8th intel cpu (or higher) as these were the low powered quad core CPUs which had a much bigger performance boost compared to previous generational increases. This meant T490(s) or 6th gen X1 Carbon (2018). It was pretty easy to find out that the T490 was the cheapest, and offered the most ports and expandability.
I found a bargain on eBay but lo-and-behold the screen was a horrible 1366×768. I thought they stopped selling laptops with such dire screens. But no, and in fact you can still get models with them today from Lenovo. I later rechecked the listing and it conveniently didn’t specify anything about the screen resolution.
I had the choice of sending it back and buying a new one, (or sending it back and not getting another as why do I need six computers in the house), living with it, or upgrading the screen. I did upgrade the screen of my X230 about 5 years ago and that was pretty easy. It looked like buying a replacement screen would be the cheapest. Especially if I can sell the old screen to recoup some money.
Finding the right model to get was pretty straight forward. A quick visit to /r/thinkpad and searching for screen replacement so led to finding out which model is best to get. There’s also this review of screens by notebookcheck. Supposedly it’s the Innolux N140HCG-GQ2, and this is what I bought from an interestingly named store of Softhands.co.uk. I’ve just noticed there’s a B1 version but don’t know if it’s better.
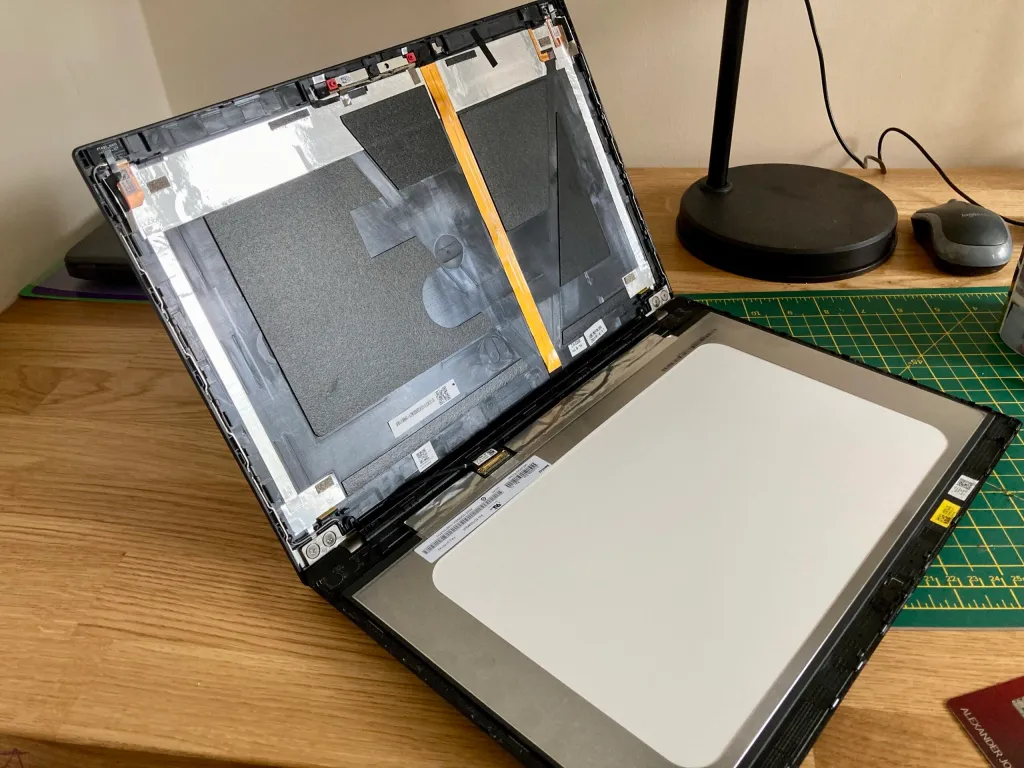 Plastic clips and a bit of stick is all the keeps the screen attached
 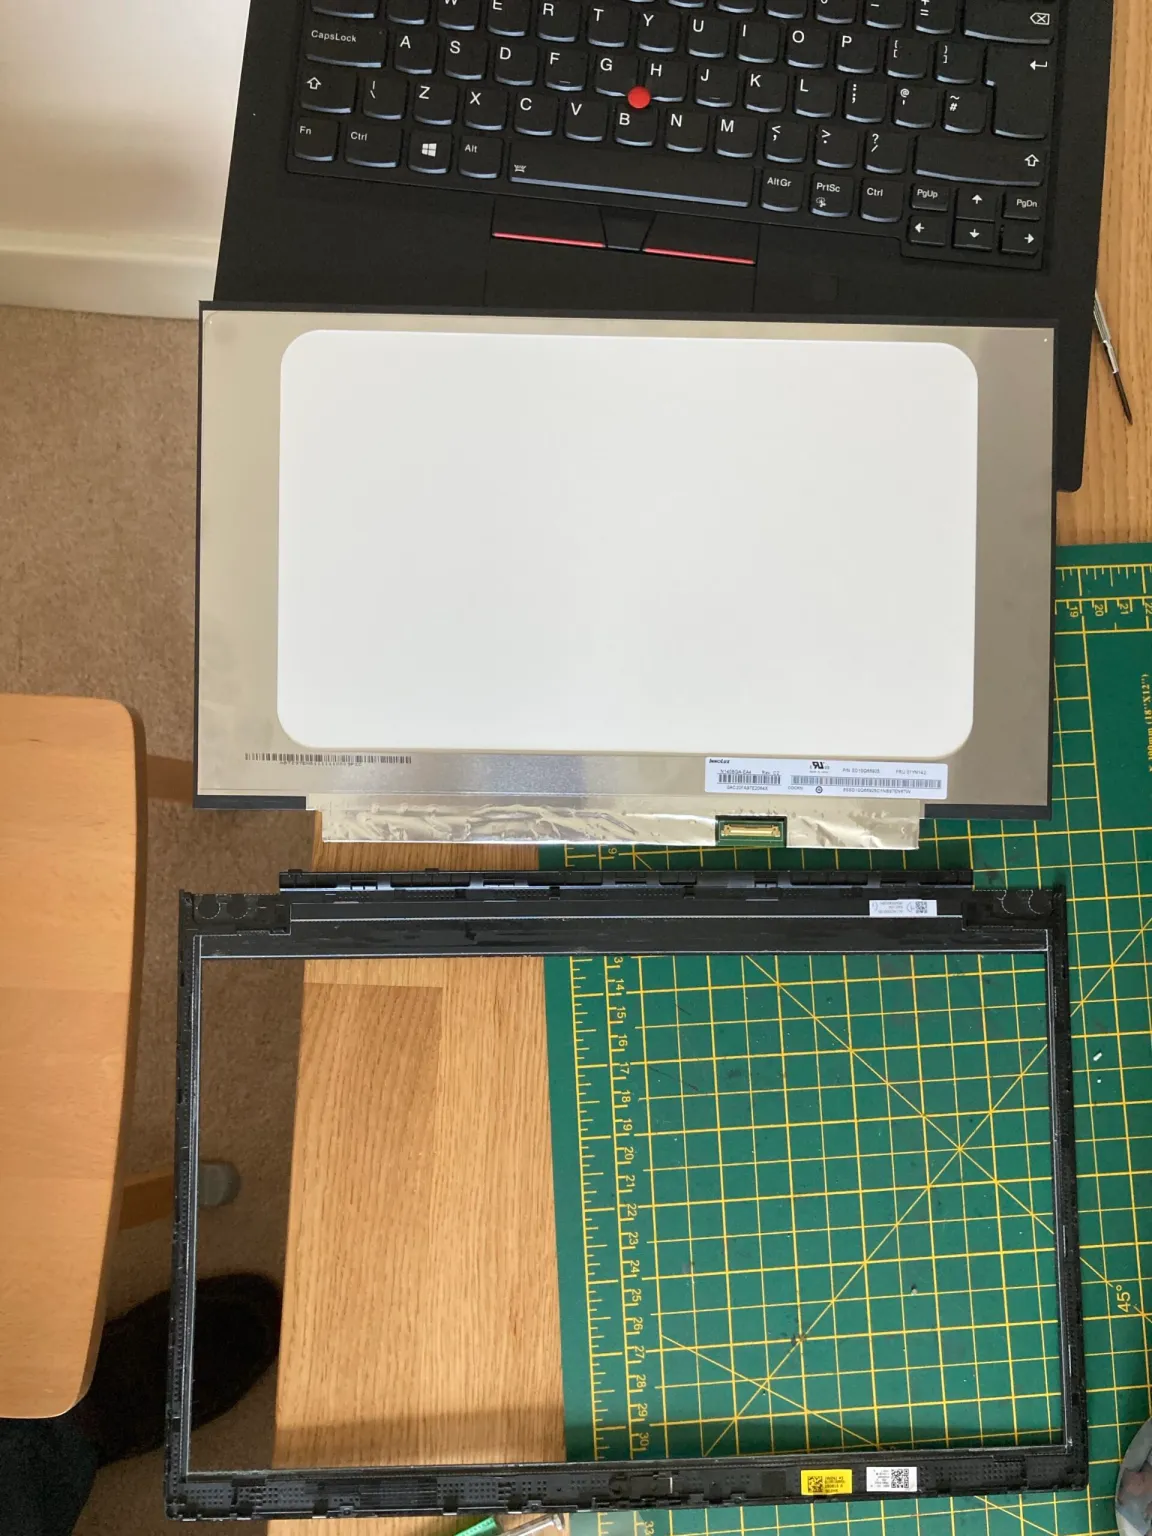 More sticky holds the bezel and screen together
 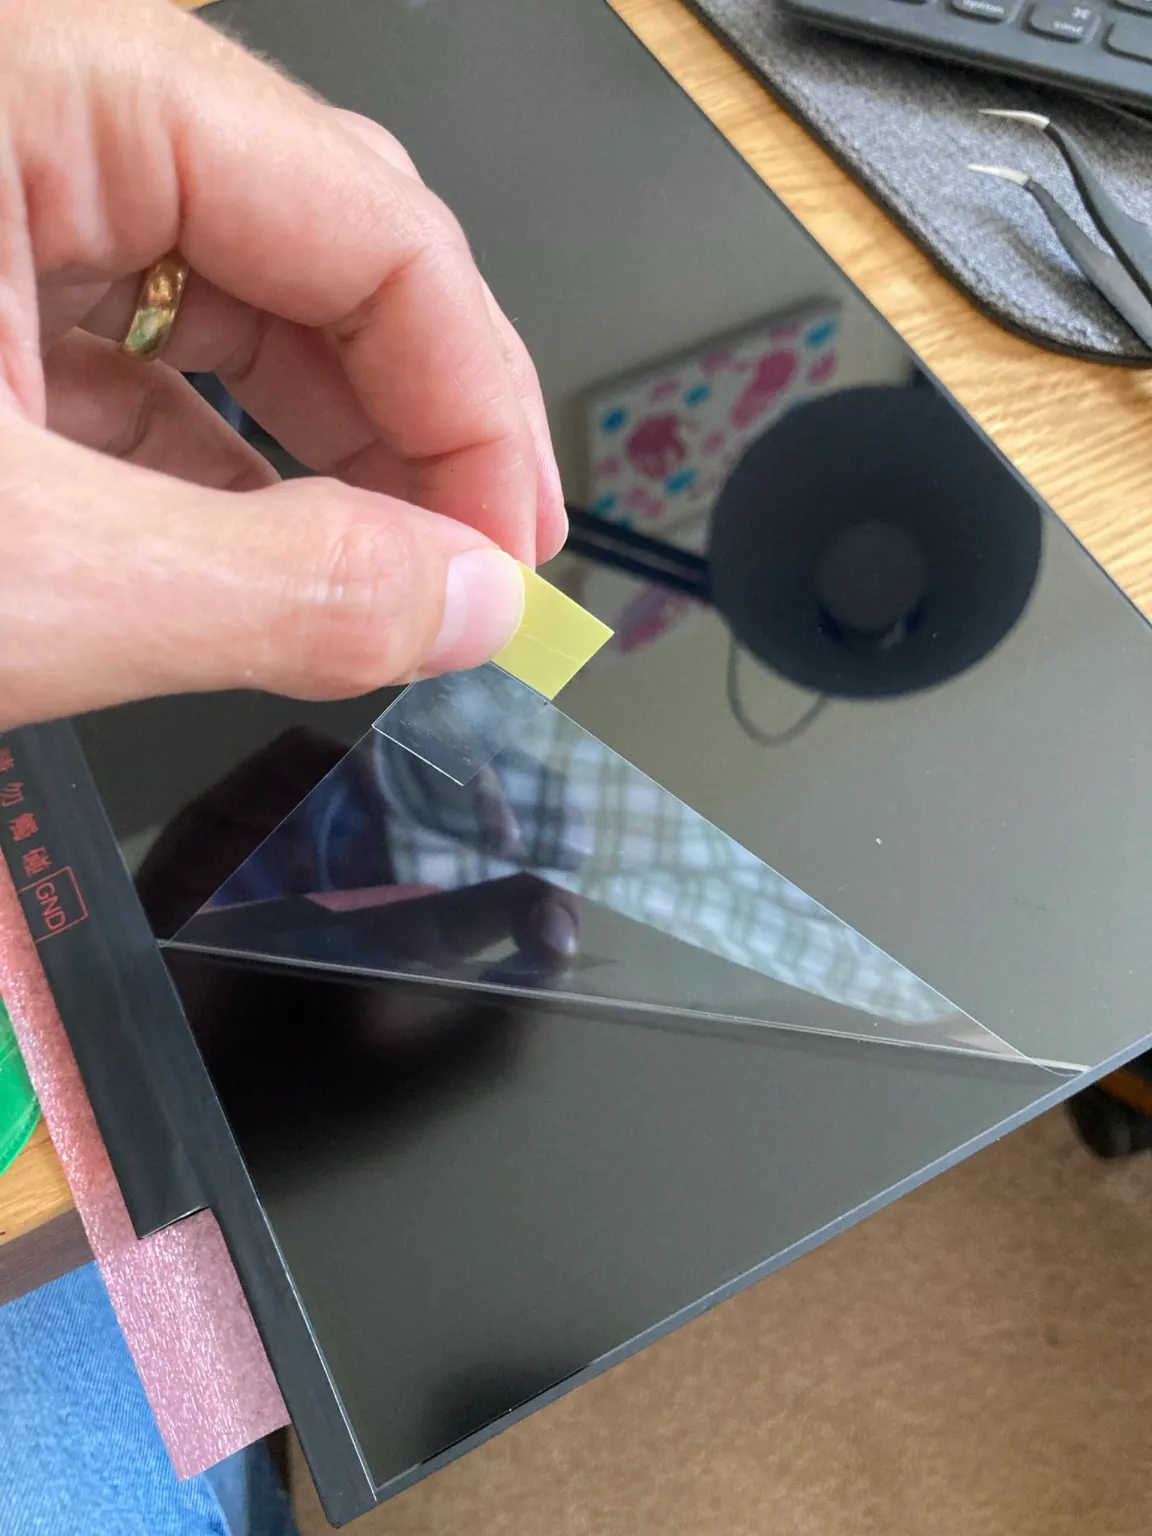 The best part
There are a couple of videos on YouTube showing you how to do it, and even some videos by Lenovo. Like all ThinkPads there’s the service manual which has a lot of good information for any upgrade or repair you might want to me.
I used a small screw driver to start separating the bezel from the lid and then a metal credit card to separate it further. There are a few sticky parts that need pulling apart. You need to apply more force than you think to get it to separate.
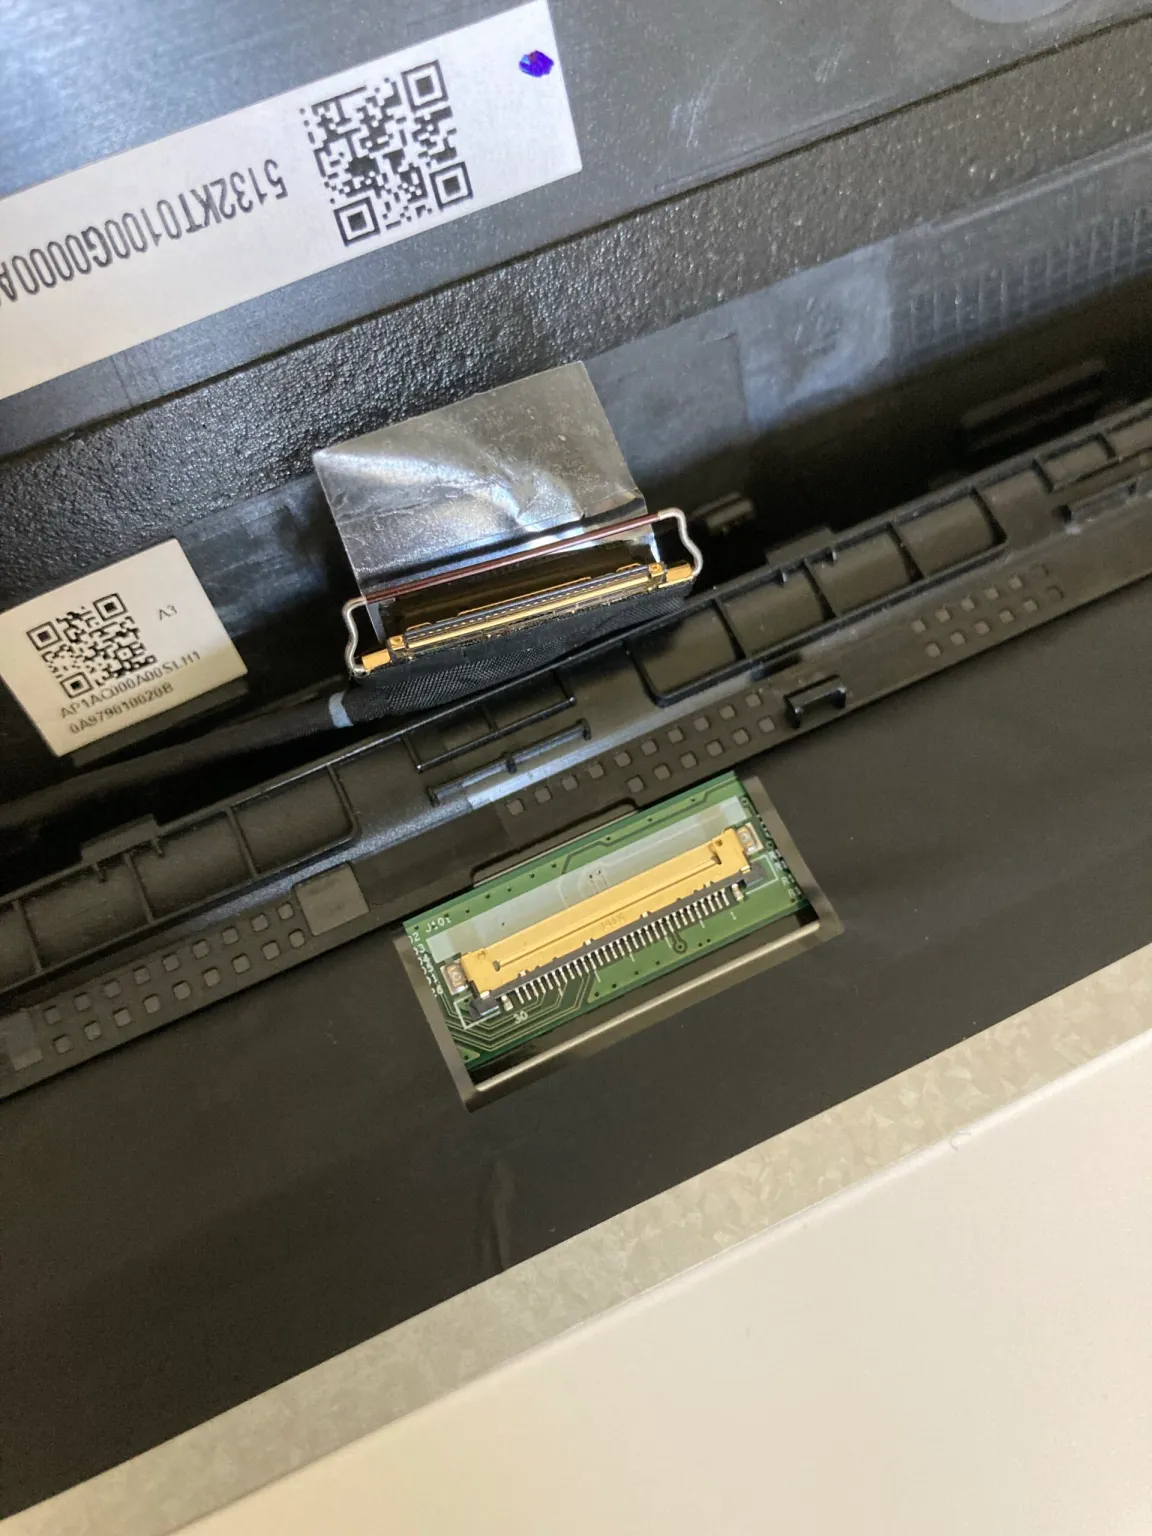 Screen connector
Detaching the cable is the fiddliest part. There’s a catch to lift up and over and then the connector slides out parallel to the main board towards the lid. I have some pointy nose tweezers that helped with this part. Getting this back in when reassembling is equally fiddly and you need to make sure it goes all the way in so that the two parts are flush together.
The first boot and the Lenovo logo appeared but then it all went blank. Oh uh! I restarted and went into the BIOS — the screen was working fine again — poked about in the settings but there wasn’t anything to do regarding the screen so I restarted and, Success! Windows booted and I could change the resolution to 1920×1080. 🎉
There is a balance between screen area, resolution and pixel density. I find native 1080p a good balance between them on a 14” screen. A higher resolution and everything gets too small to read. You can up the scaling but then you start to lose space, also I find non-integer scaling, such as 1.5 or 150%, can sometimes lead to funny text or other UI annoyances. It’s been a while since I tried, so I’m sure OSs have improved this. You can avoid this by going with a 4K screen and doing 200% scaling, and it looks lovely, probably also because the panel has full colours and great brightness.
So if you have a low resolution screen, I’d definitely encourage you to look into replacing it yourself. Now I’m off to install Linux on it! 🐧
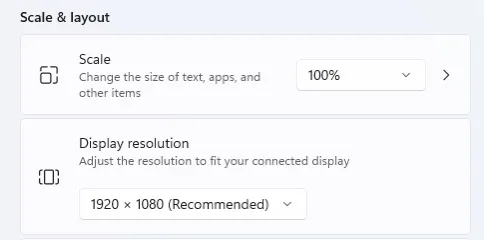 This is what you want to see
I’m having fun playing Dark Forest - the 277DAO community round this weekend. I tell myself “just one more move” but then it’s 2 hours later 😵

E-ink success! Now to see if I can fix the dodgy soldering job so the pi zero (with wifi) will work.

It’s only taken 5 months but I’m starting!
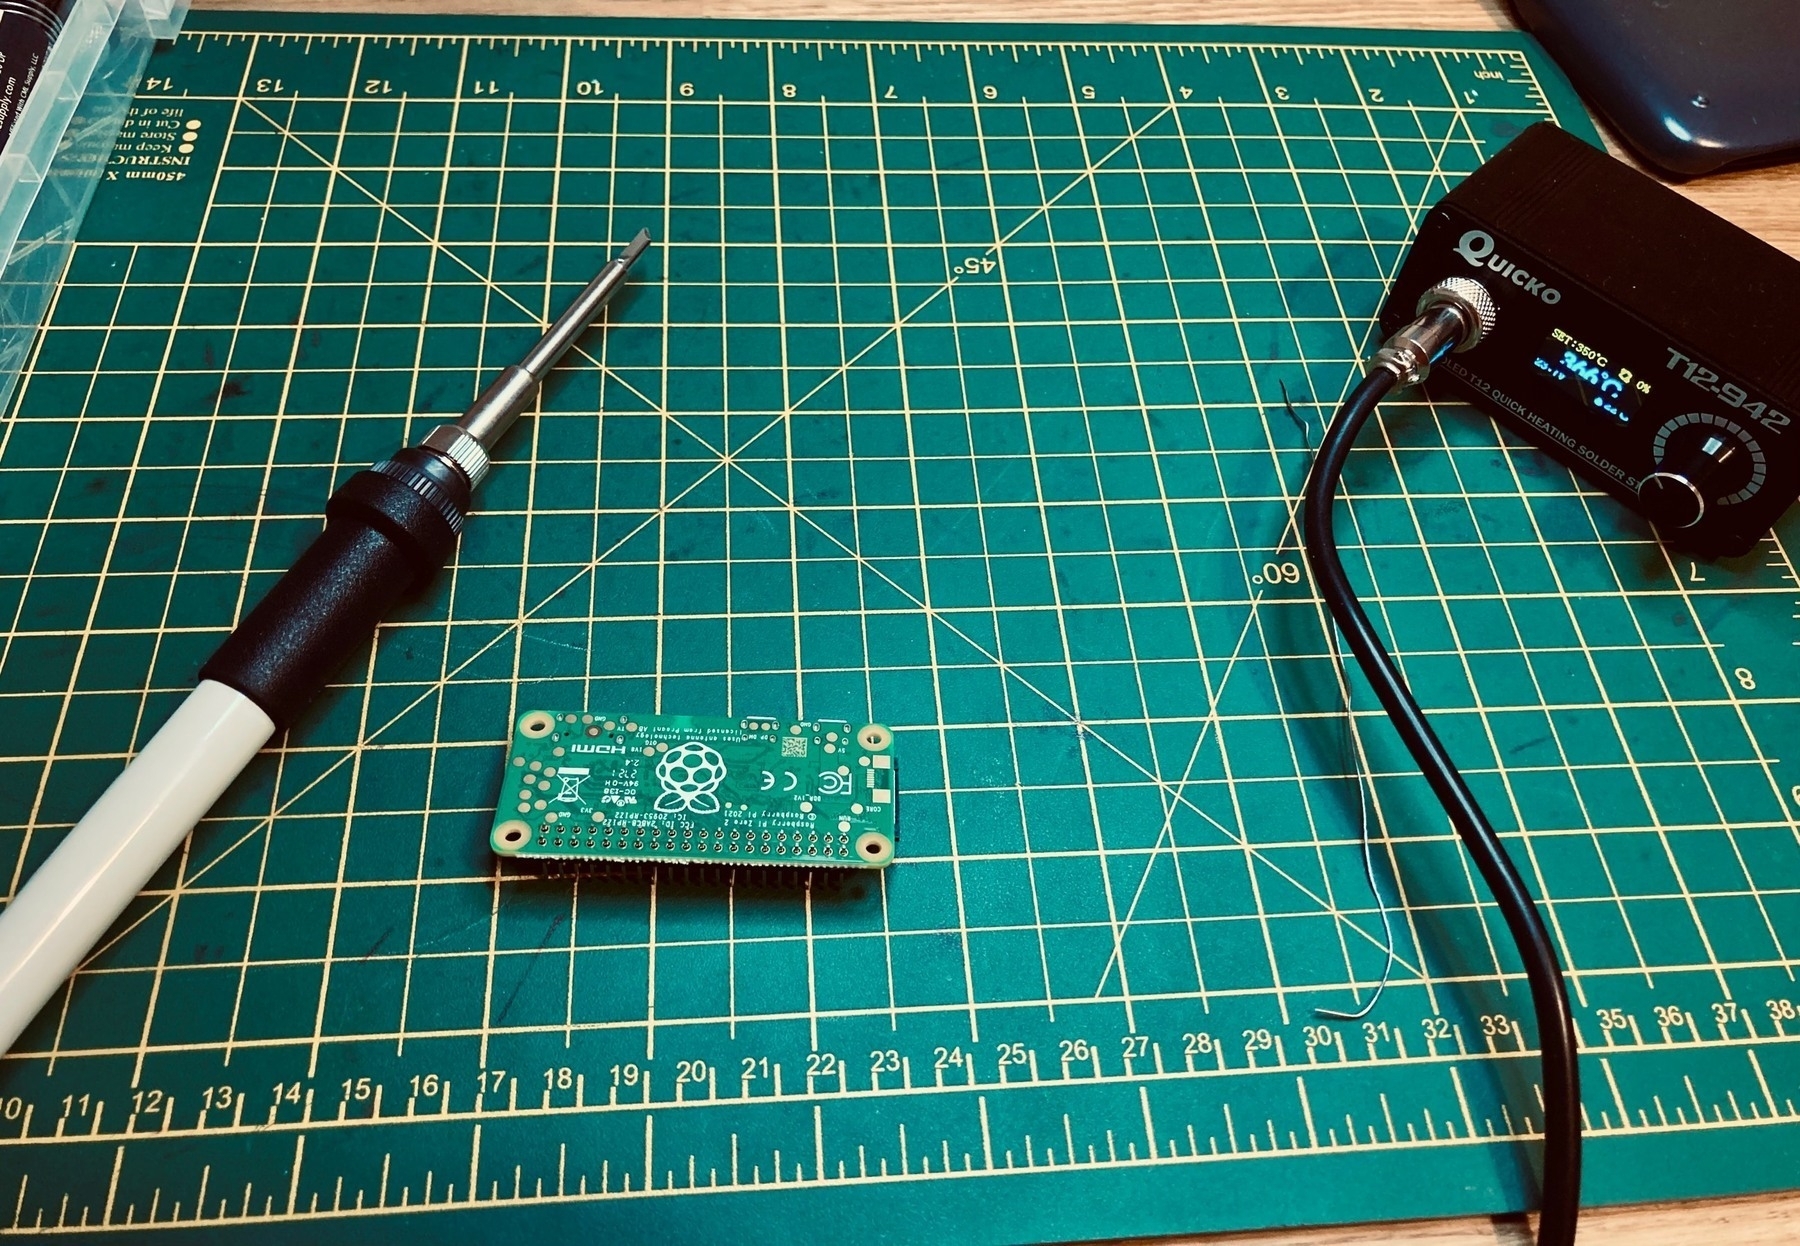
The Pi Zero 2 doesn’t come with GPIO pins so I had to solder the header. Not a bad attempt. One pin did pop out later on.
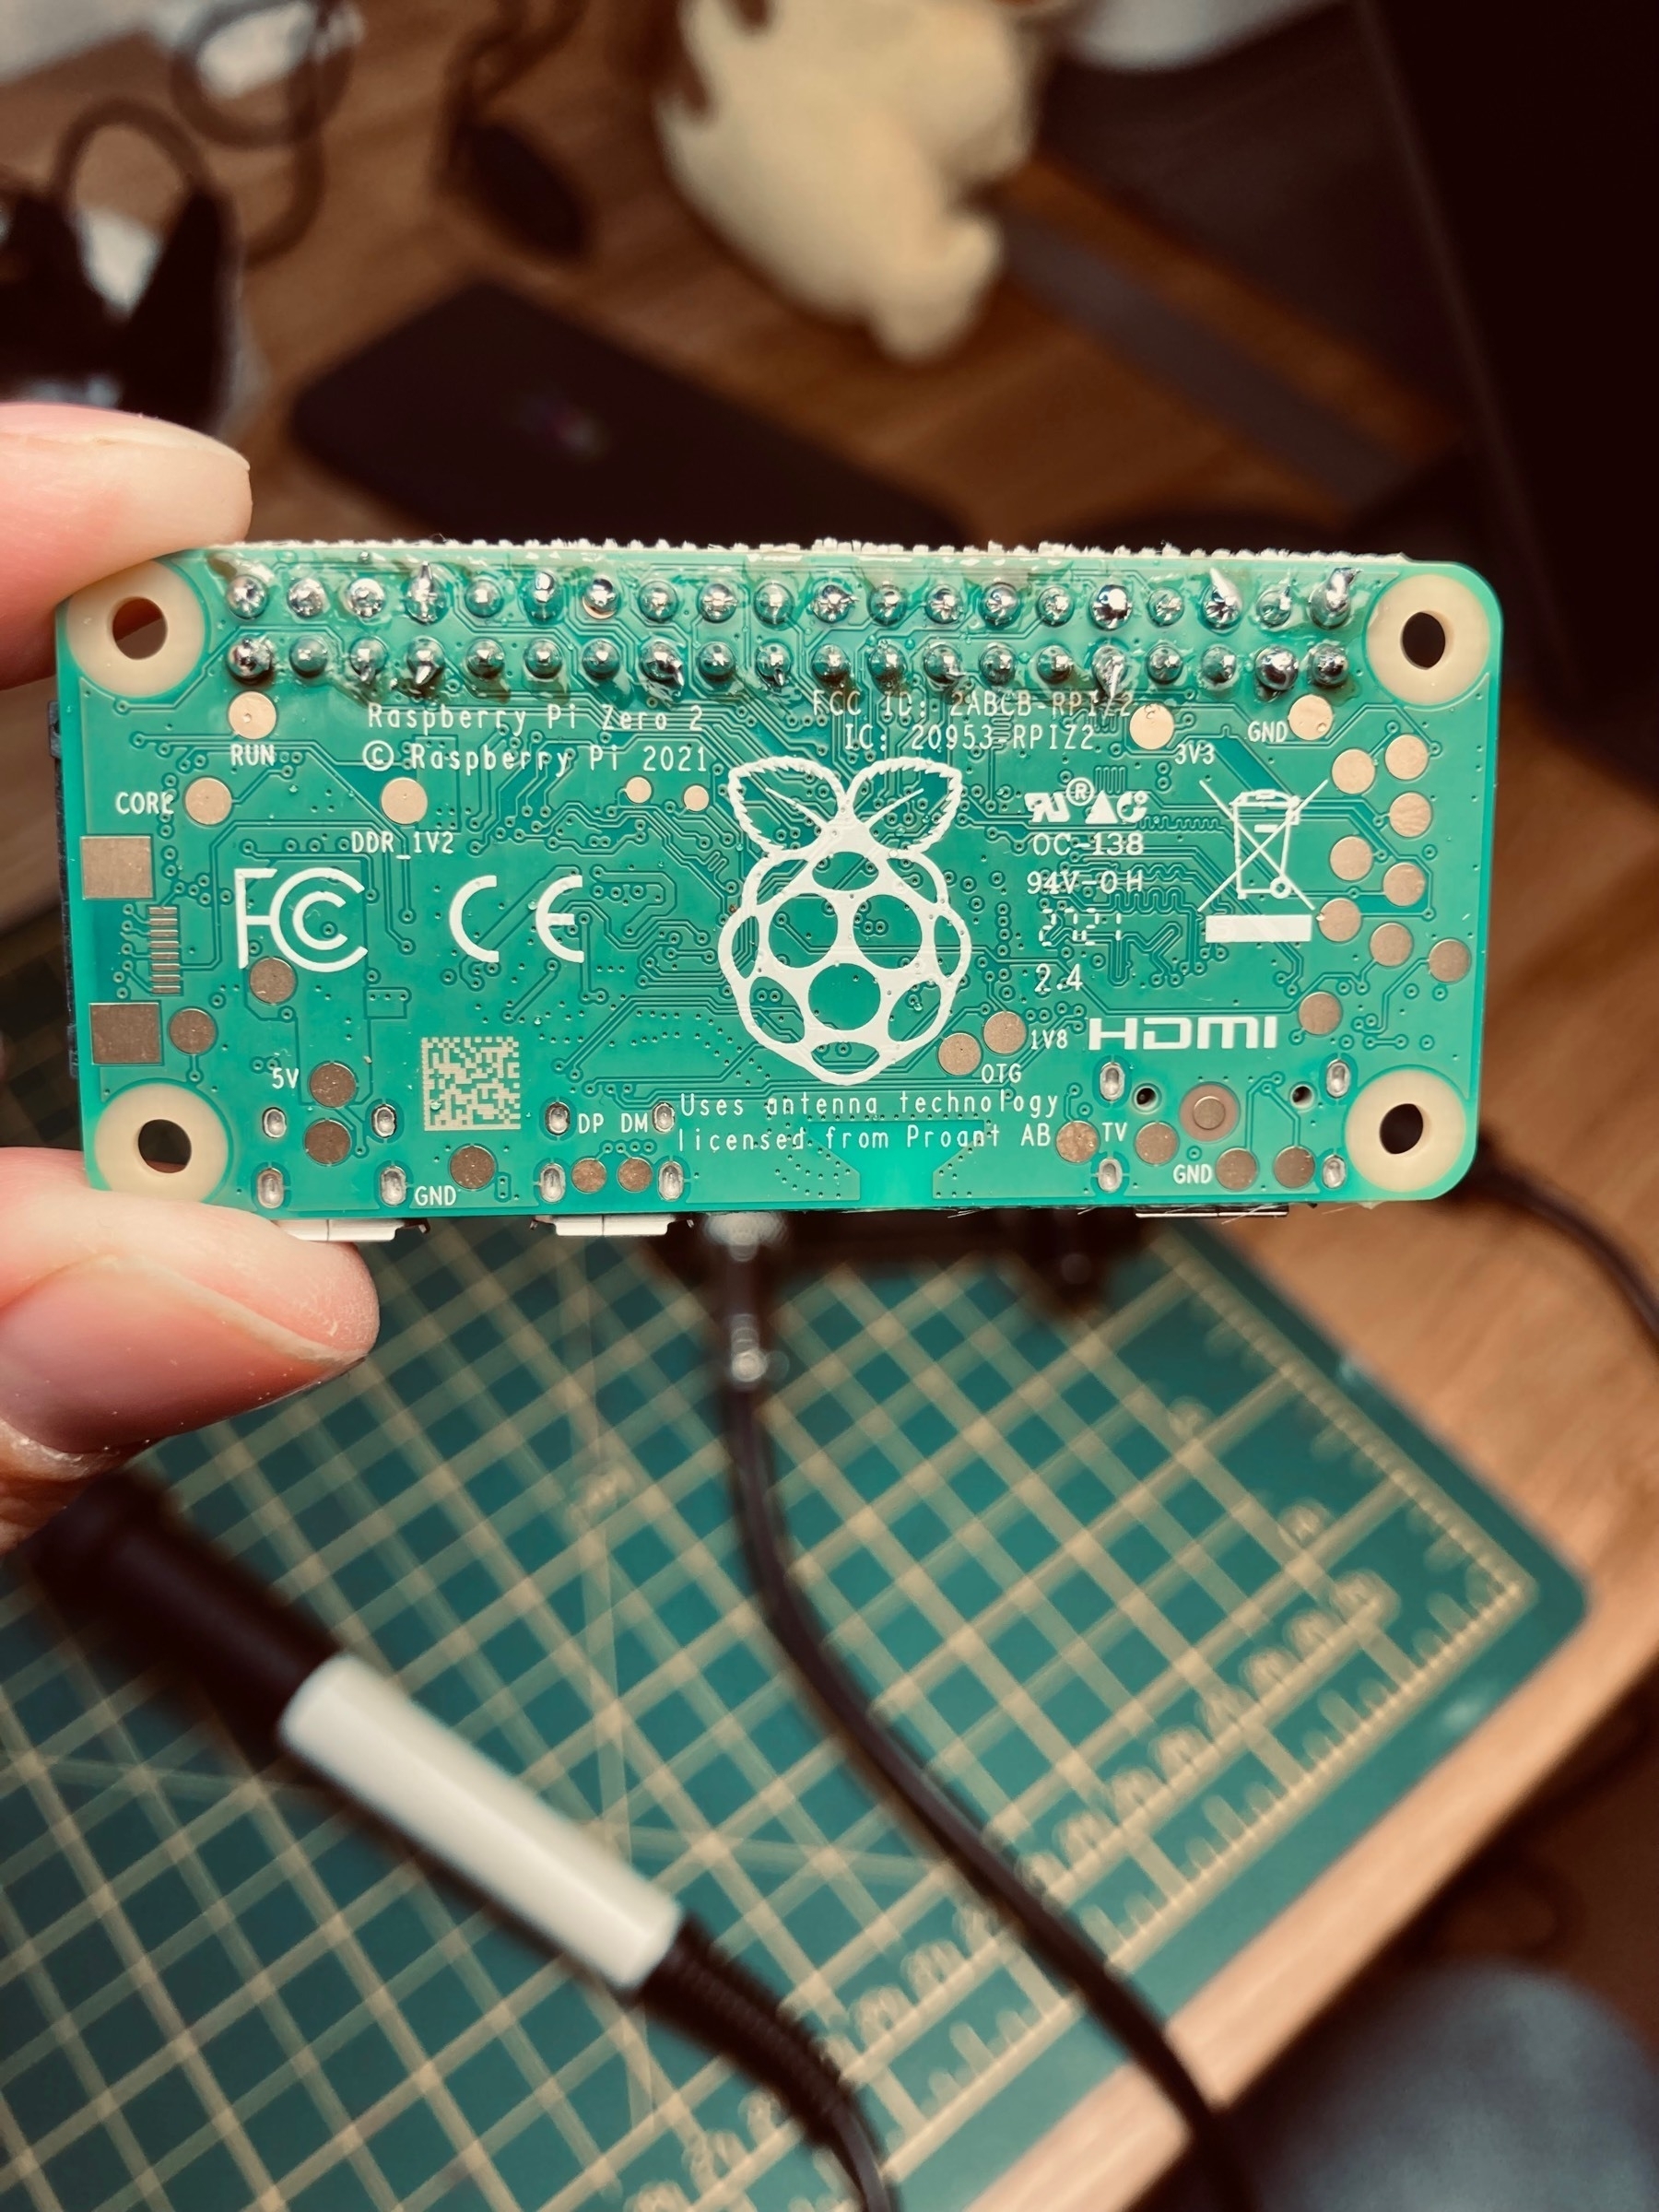
The hardware part wasn’t very hard! Next stage is installing the software then figuring out what I’m doing with this thing! 🖼🧑💻
My cheap, old 2012 mac mini seems to struggle with the 50,000+ Photos library. I don’t want to buy a new one as the current 2 TB SSD will be pricey to replicate in the M1 version!
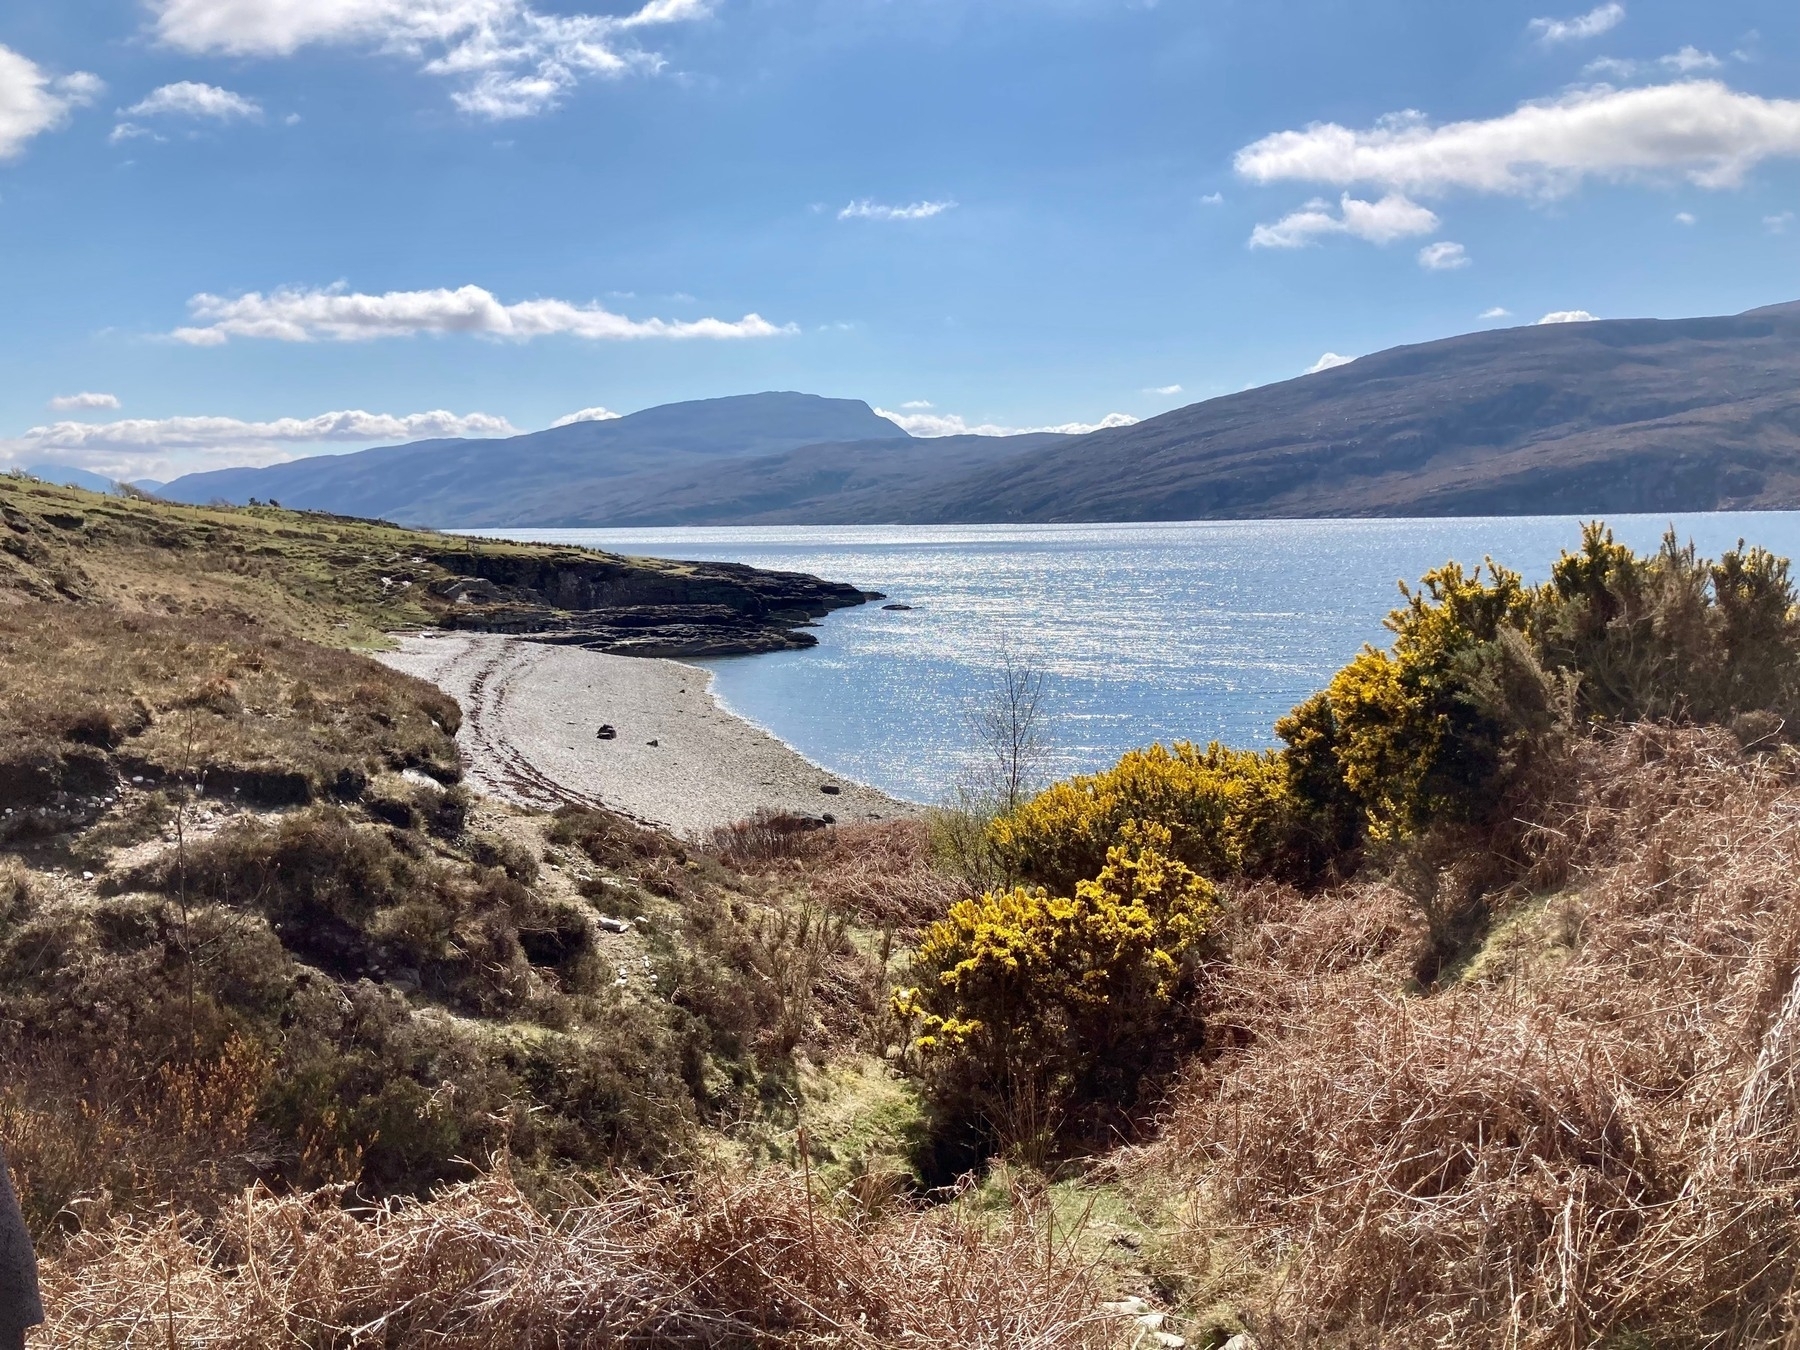
Enjoyed staying at the Ceilidh Place in Ullapool this weekend. I could retire to this place.

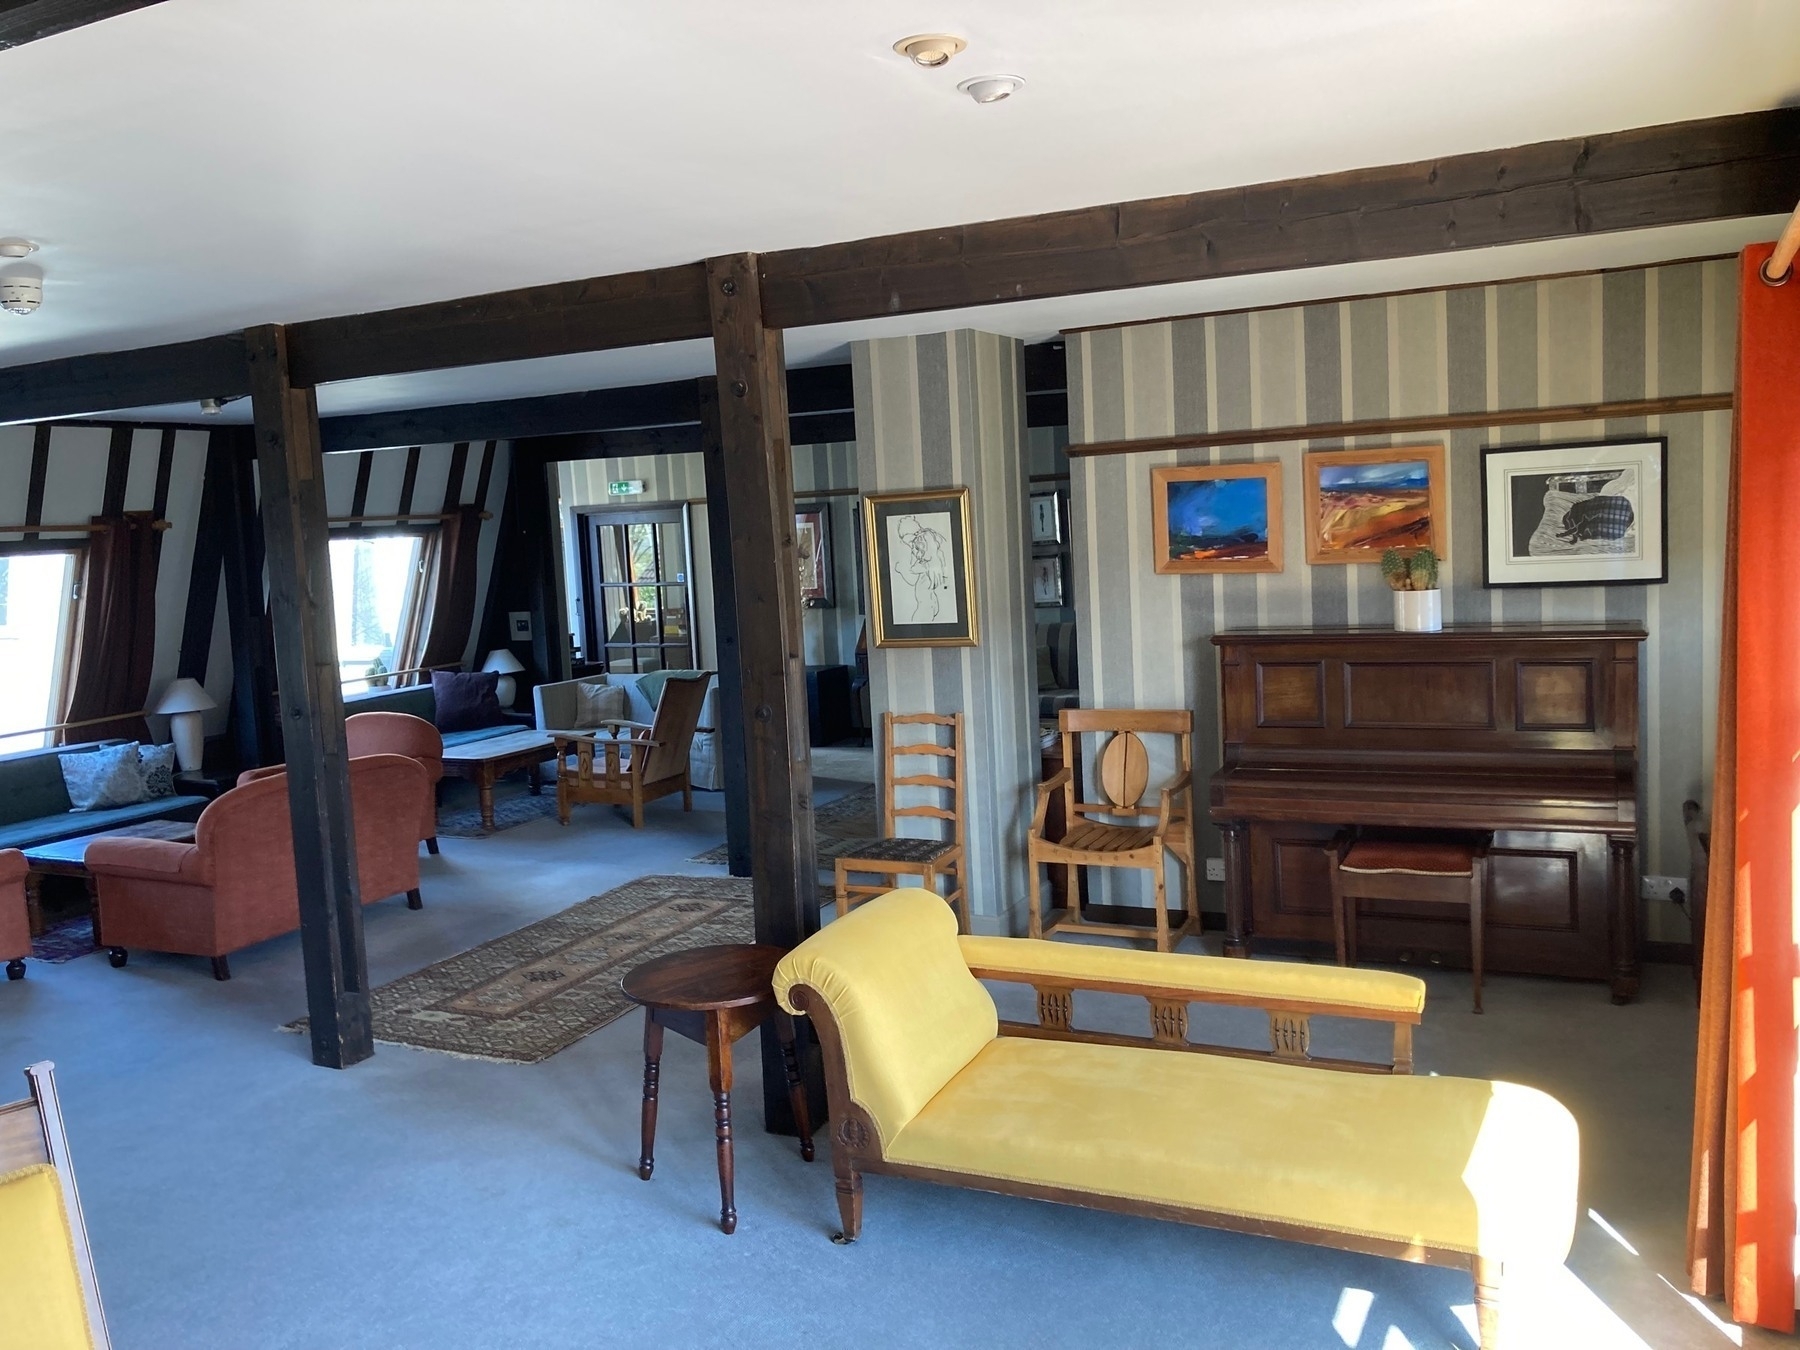
The local scenery is incredible.